Tuesday, January 31, 2012

Coastin' Along (Part II) : Decoupaged Tile Coasters

Yesterday I told you how to make the "man" project bottlecap coasters. Do I like those coasters? Yes. But...personally, I like my coasters prettier. So for the girls (Patti, Krista & Carole), I made decoupaged coasters. Patti & Krista got decoupaged paper coasters and Carole got the uber fancy decoupaged photo coasters.


As with my other Christmas projects, I had a major fail in the photo department so I had to recreate the projects to get my tutorial pictures. Don't worry...I'm learning my lesson. Next time, photos will be taken as I go. I'm more or less telling you this so that you won't freak out when the beginning and final photos aren't the same as the "in progress" photos. Deal with it people.

For this project, you'll need :

Ceramic tiles (you can get these super cheap at Home Depot or Lowe's; I paid $0.11/each for mine).
Paper and photos
ModPodge
Foam brush
Clear coat (not pictured, but I used automotive clear coat)
Adhesive felt pads


First, cut your paper and photos to the match the size of your tiles. I approached this two different ways: some I cut to the exact size, some I cut slightly smaller. I advise cutting them slightly smaller - this seems to help the edges seal better.


Any ModPodge will really do, but I chose the glossy. To adhere the paper/photos to the tile you can either apply the ModPodge directly to the tile

This is the underside of a tile. If you look close, you can see the ModPodge streaks.

All tacked down. Seriously, how pretty is this girl?

or to the item you're adhering.


I think I tended to get a better result when I applied it to the tile. I seemed to get more wrinkles with the paper application (note the bowing in the above photo).

Once the paper/photo is glued down, coat the top with more ModPodge. I did about 3-5 coats. Don't panic when you do this. It will go on white and goopy, but it will dry clear.


Try to apply it as smoothly as possible, but don't worry about streaks that may develop. It'll be okay. I promise.

(See...blending in.)

Additionally, on the photo tiles, the ModPodge may pull up some ink. In my case, I've done all of my photos in more of an antique coloring. I honestly can't tell you how full color or monochrome photos will do. In my case, they dried out just fine.

Calm down and breathe. It'll be okay. See...the Minnie ears are already clearing up.

Let these dry fully. (I suggest overnight. And don't be checking them after four hours with your fingers people. Be patient.) In my experience, the paper ones tend to dry faster than the photo tiles.

After 3 hours.

Also after 3 hours. Note that there isn't a red issue in the drying areas.

Once they have dried, apply the clearcoat. I did this out in the garage. The fumes are, of course, awesome. Do these coats rather thin. This will prevent bubbling. You can add additional layers about every 30 minutes to an hour. We did three coats and then left them in front of our fireplace for a few hours. Collin then blasted them with another four to five coats the next day. He went a little overboard, but I admit they came out awesome.

Ooh...shiny.

If you run into bubbles, don't panic. I had that happen on a couple of them when we put the clearcoat on too thickly. Collin helped me solve the problem (mostly because I had a rather crazy panic attack). He wet sanded the areas to remove just enough clearcoat to get to the bubbles. After that, he just started over again - this time with THIN layers.

Bet you can't guess which two were wet sanded and repaired...I can't...and I made them.

After the final coat of clearcoat has dried for at least 24 hours, apply the adhesive felt pads to the underside corners. I put mine about 1/2" from the edges. Let the tiles cure for another 2-3 days in a warm location before stacking them, using them or putting anything on top of them. Stacking them early will result in imprints. (Hint: Your fingertips will also do this. DON'T TOUCH. Resist the urge. I know you can do it.)

And when you're all done, they should turn out nice and pretty and everyone will love them. Well...I will at least.

We can occasionally be a presentable family. Oh...in case you can't tell...we like our sunglasses.

Monday, January 30, 2012

Coastin' Along (Part I) : Bottlecap Coaster Tutorial

For those of you curious about last night's dinner adventure with the sesame chicken, here's the review. Darian loved it. Collin was okay with it. I didn't fare too well with it. It did not make the cut for our regular rotation.

That being said, let me inform you of one disclaimer: I don't so much like chicken. Chicken nuggets, sure. Chicken from a can, no problem. Chicken breasts or chicken actually still on bones? Did you just see me do a full body shiver? Eww. With the chicken breasts, it has something to do with the dryness of the meat. The texture gets to me. And chicken still on bones...umm...hello...bones. No thank you. Now I can handle beef and I can handle pork, both with bones. I draw the line at chicken. I know that's weird, but it is what it is. If we have fried chicken, Collin has to pull it off of the bones for me.

But...speaking of picky eaters, my friend Michelle over at In Search of the Sidewalk wrote about her peculiar eating habits yesterday. She's making me feel better about myself.

Now, back to what I really intended to write about today. Remember those Christmas projects I did? Believe it or not, I'm actually going to teach you how to do one of them. Shocker isn't it?

Today's project : Bottlecap Coasters


How awesome are those? I mean really, come on. I love them. I made a set of four for each of my brothers and one for Owen. They seemed like pretty decent guy presents.

Having enough bottlecaps to make these and have such a varied number of brews is tricky, right? Well, I've had a serious stash of bottlecaps for years. And how did I come across such a wonderful collection, you ask? It's all about who you know. My younger brother attended one of the nation's universities most noted for their partying. Score. When bottlecaps started to get popular in scrapbooking about, oh seven years ago, I asked him to save them up for me. Thus, three large tackle boxes shoved full of caps from a whole lot of different beers. (I won't judge his roommates by the fact that there were Mike's Hard Lemonade and Zima caps in the mix.)

And so they sat in my scrap closet...for years...gathering dust...until I came across this gem on Pinterest. I found two problems with these. 1 - I don't buy stuff that I can make. That one is pretty obvious. 2 - Theirs are held together with steel wire. I wanted something with a base. So...I set out to devise my own system.

Here's what you'll need for my method :


1. Caulking gun
2. Silicone or construction adhesive
3. Acrylic sheets (found at any hardware store)
4. Acrylic knife
5. Adhesive felt pads
6. Bottlecaps (duh)

Now don't try and be all smart and think you can just use a craft knife. Nope. Doesn't work. Trust me - I tried it. Badness and cursing ensued. And I'm not talking X-Acto Knife. I'm talking one of these :


You might also want a cutting mat and a heavy duty (read: metal) ruler.

First peel the protective coating off of the acrylic sheets. These will most likely be on both sides. Then cut your sheets to get a nice pile of 4x4" squares. Don't worry about the edges being perfectly square...we'll fix that later. If you do worry about them being square, well then this project is going to take you a while. Good luck.

How artsy is this picture?
Now that you have your bases cut, it's time to pick out your bottlecaps. I highly advise washing these first so you don't have stinky and sticky beer residue to deal with. I put mine in the silverware rack of my dishwasher and blasted the crap out of them. Tada.

Pick out nine caps for each coaster. Line them up to figure out your configuration before you start to adhere them.


Now it's time for the messy and smelly part. Seriously. I nearly got high making these. Remember this tweet? Ya...I was working on these.

So, keep little hands out of the room and pull your hair back. Please don't wear nice clothes. You don't have to be prepared as if you were painting your ceiling, but don't be dumb and wear expensive jeans or your favorite t-shirt ever. Your hands will be covered in ickyness. (Yes, I'm making that a word.) Oh, and another tip. When you open your adhesive, make sure to puncture through to the back end of the tube (I shoved a wire hanger up through mine), otherwise your hands might just fall off from trying to squeeze the crap out of the tube.

You can technically start anywhere, but I like to glue down the center cap first and then work around it. Don't worry about being evenly spaced from your edges, but get it close.

Fill the cap with adhesive.
Now you can just smoosh it down on the acrylic at this point, but I found that I was getting some air bubbles underneath. So I took to flipping the cap over and wiping it against a spare piece of posterboard I had hanging around.
Now that the cap looks pretty and filled, squish it down onto the acrylic. You'll want to get it into position fairly quickly so that it doesn't get stuck in a weird spot. Continue to add the caps one at a time, with the sides touching. You should end up with something like this...


See that extra goo all over the place? If you used silicone, no big deal. It peels off with the use of a small tool (I used some broken dental instruments I had around the office). If you use adhesive...keep some Q-Tips (some wet, some dry) handy and remove the excess as you place each individual cap down. The adhesive is a bit more difficult to remove cleanly.

If you've filled each cap properly, the underside will look like this.


Okay...now it's time to get creative. In order to smooth my edges, I used my Brassler and lathe at the office. Basically, it's a Dremel. It worked pretty darned good. It also made a huge mess that I apparently left all over the floor for my assistant to clean up on Monday. Oops.

Now you'll have Coasters with lovely smooth edges.


Lastly, you'll need to put the felt pads on the bottom to keep them from roughing up tables. Just peel the backing and stick them down to match each corner cap. That way they're hidden from view and nicely balanced.

Let these babies air out for a while before you use them. Otherwise you'll be getting a buzz on top of your buzz. I'd say 3-5 days.

Also, a few other helpful tips. Beer bottles : good. Tumbler glasses : good. Wine glasses : BAD. OH SO BAD. I very nearly shot a wine glass off of one of these puppies over at Owen & Patti's house. 

Additionally, if you used the silicone, the caps can come loose if the acrylic is flexed. Don't panic. Hold the offending cap in your hand for a few minutes to warm it up and then squish it back down nice and hard. Tada!


See...wasn't that fun? Now we have some manly coasters. I'm planning on assembling some for ourselves to keep in the still to be constructed bar in our basement. Nothing like having all the accessories before you have the furniture. Whatever.

Oh, and don't worry...I have girly coasters coming up next...

Sunday, January 29, 2012

Summary Sunday - Chore Day Shmore Day Edition

Well...I have a ton of stuff on my "to do" list today. I'll be honest...stalling by writing this post? I'm totally okay with that.

Here's what's on the list for now :

1. Laundry : 1st load is in the dryer, 2nd in the washer. I'm thinking another 2 loads and I can call that done. We're just going to pretend that putting the clothes away isn't part of this task...

2. Coupon Cutting : So, I'm slightly anal about how we go shopping. But - it pays off! Other than picking up the essentials like milk and cheese, our family has been able to avoid grocery shopping since November! (And, if you're wondering...we've now been Wal-Mart free for over a year!) That's right. When I did my shopping last fall I was able to stock us up so well that we've had meals for three months! Honestly, we could probably make it for another two weeks if I just went and got eggs and cheese, but the natives are getting restless for some new snacks.


I'm cheating. I'm dividing up the tasks over the next few days so that we can be ready for shopping either Thursday afternoon or Friday. Today, I'm cutting coupons. Tomorrow, I'll be taking inventory. Tuesday, I'm gathering up my recipes and doing the meal plan. Based on what is going to be on sale, I'm going to aim for two months worth of meals. I'm also going to attempt to do more crockpot cooking over the next few months. It's highly convenient and it seems to stretch my dollar further. In fact, I currently have some sesame chicken in the crockpot thanks to Pinterest. We'll see how it goes.

But, I digress. Wednesday will be my wrap up day. I'm going to put everything together and build my binder for the trip. I'm expecting a $200-300 run if we end up with two months of meals. I'll keep you posted...

3. Project Life : I've totally been slacking on this. I'll admit that right now. I have the photos all together for the last three weeks, but I'm behind on journaling. So the goal for today is to get caught up on journaling and prep the pics for my post on January's pages (finally).

I'm pretty sure I had other stuff on the list, but I think I've already hit burn out. I can't remember anything else at the moment. Oh well, let's move on to wrapping up the week instead.

Posts I Posted : It was a slow week. Darian wrapped up his reviews for the Percy Jackson series and I went slightly postal on my feelings for stupid parents.

Recipes I Tried : Other than today's foray into Crockpot Sesame Chicken, it stayed pretty low key around here. The nice thing about making big Pinterest meals is that we tend to have leftovers for a while. Oddly enough, the boy loves him some leftovers. He always cheers when I say that's what we're having for dinner.

Books I Finished : It's not finished yet, but it will be by this evening...I'm currently reading The Night Circus by Erin Morgenstern. It's really good. Thank you to Patti for her suggestion!

Projects I Finished : Nothing got finished. Let's face it, it was kind of a lazy week. I did do some things in preparation for a tutorial I'll be posting next week, but other than that, the only thing I finished was editing the photos I took at Kirsten's birthday party last week. Some of them turned out quite cute. I even managed to get one that makes my guys look photogenic.


Best Blog Post : I've taken to cheating and starring my favorites on Google Reader. My memory is crap. I'll just go ahead and throw that out there. So, even if I find something wildly hilarious...I completely forget what it was by the time Sunday gets here. I need all the help I can get.

This week, it isn't something funny, but rather something that I found pretty poignant. It's Ali Edwards' post of a video based on Ira Glass' "Ira Glass on Storytelling, Part Three". She found it on Sabrina Ward Harrison's facebook page. I found it fairly inspirational...and I'm not very sappy, so that's saying something. Oh, and I initially watched it with the sound turned off. I found it even more powerful that way.


On that note...I'm going to go be creative...with coupons...and Project Life...

Saturday, January 28, 2012

Guest Post: Darian's BOTY


I just finished reading Percy Jackson and the Last Olympian by Rick Riordan. I rated it 5 out of 5 stars because I loved it! I kind of wish that the series would keep going on because it was so good that I was sad when I finished it.

Percy Jackson and a group of other demigods try to protect Olympus from being destroyed by the Titan lord Kronos and the monsterTyphon. This is about the great prophecy that was made about seventy years before the book took place. The great prophecy says that whoever out of the Big Three's kids to turn sixteen first will make a choice to destroy or protect Olympus.

The demigods and the gods have only a certain number of days to protect Olympus. The reason why is because Kronos is planning to attack Olympus while he has the gods busy fighting Typhon.

I liked almost all of this book. I didn't like that it took so long to defeat Typhon. I liked it because of the monsters and because there were so many battles with Kronos and the other Titans. The part that made the battles cool was that there weren't very many people with Percy protecting Olympus while there were a whole lot of people with Kronos.

It was really fun to read this book. The part that made it fun was that it was so much information that I didn't really want to go to bed or stop reading when I started reading it.

Wednesday, January 25, 2012

Please Don't Make Your Child Afraid Of Me

I don't typically write about work on the blog. In fact, I rather like to keep it separate from what I consider to be my "fun". But...there have been some experiences at the office lately that have made me realize that maybe a little Public Service Announcement is in order to help some clueless parents wake up. The basic premise of this post - think before you speak and follow the golden rule (you know, do unto others as you would have done unto you).

In my practice I see a lot of kids. A LOT. I would say nearly 80% of my day is filled with patients under the age of twelve. I enjoy that. Kids are usually a really fun part of my day. What I don't enjoy is when an ignorant parent ruins the child's experience with me before it even gets started, making it more difficult on everyone involved.

Nearly every child has some form of an innate fear of or nervousness around medical professionals. That's just the way it is. Things are foreign and scary. I expect that. But that small level of fear is typically easy to work through by building a little trust. In our office, we call this tell, show, do. Basically I tell the child what I'm going to do, show them what I'm going to use (sometimes demonstrating on my hand or theirs) and then we actually move forward with the procedure. This takes away a lot of the unknown and a good majority of kids learn quickly that we are there to help them and that sometimes it can even be fun to go to the dentist.

But...then there are the other, let's say 10%. These children are ruined for me. I will never gain their trust. I will never be able to work on them with everyone in the room being calm and comfortable. In fact, I may not be able to work on them at all. I may have to refer them for sedation dentistry or it may take me years to get them to trust me enough to even lay back in the chair. Why? Because these children have parents who have increased their fear and made the dental office a bad place to be.

There are three typical scenarios for this problem :

1. Mom or Dad had a bad experience as a kid or is phobic as an adult - and they share this with the child.

Okay...you had a rough time at a prior visit. Maybe you couldn't stay numb. Maybe you had a tooth that was in a lot of pain before getting worked on. There are unfortunate bad experiences out there. But please don't poison your child's idea of what it will be like.

Don't tell them "when Mommy was little it really hurt to go to the dentist and he/she was really mean." Really? Your kids trust you. They're going to believe you over me. If you're telling them that dentists are mean before they even meet me, what are the chances they even want to let me lay a finger on them? I'll tell you: slim to none.

2. Parents threaten their child with a trip to the dentist if they don't brush their teeth.

Please, please don't threaten your children in order to improve their oral hygiene. Don't tell them that if they don't brush they'll have to go to the dentist and get a shot. Are you kidding me? How would you react if someone said that to you? Imagine going in to see a physician for some ailment that needs treatment via surgery. What if the physician said to you "this procedure is really going to hurt - a lot. You're going to be totally miserable and I'm going to be really mean to you"? Would you want the surgery done? Of course not! You'd be reluctant and nervous.

THIS is what happens when you threaten your child. If you want to motivate your child to do a good job on their oral hygiene, help them, teach them and reward them. (All children under the age of seven need some assistance from adult. Some children will need help or "checking" into their preteen years.) Teach your child why it is important to have good oral hygiene. Let them know that leaving food on their teeth can let tooth bugs make holes and that once the bugs have made those holes, the tooth won't heal itself. It will be broken. Let them know that they need those teeth for many years to eat all the foods they love and they have to keep them safe. Don't threaten them with a painful procedure.

3. Children are incorrectly prepared for having treatment.

If I diagnose a cavity and you tell them on the car ride home that they're going to get a shot and it's really going to hurt, it no longer matters what else you or I have to say. All they have in their little heads is that the next time they set foot in my door, I'm going to hurt them.

I am not sadistic. I do not get pleasure out of torturing my poor little patients. I do not relish in their pain. Quite the opposite actually. The philosophy of my office is to never force a child to do something they don't want to do. The very rare exception to this rule is if I am involved in the procedure to a point where leaving things as is will cause them harm. At that point, we have to finish. But if we're seeing a patient for a cleaning and they are terrified of leaning back in the chair, we work with that. There is not force, there is no threatening. There is only reward. Positive reinforcement is the way to go. If a patient is a helper for me and we finish what we have planned, then they get to pick a prize. Most of my patients love that. The prize is a good motivator. Help me by doing the same. Use praise, not fear. If a child does get a cavity, it's not the end of the world. We'll fix it. They just have to work harder on keeping their teeth clean next time. Healthy teeth are happy teeth.

The key to keeping your child from being afraid of the dentist (or other medical professionals) is to talk on their level. If you're going to talk to them about a procedure, use what we call "soft language". Sure, you can prepare your kid for their filling appointment. But tell them that we're going to give their tooth some sleepy juice or that we're going to give it medicine to make it numb. Think before you speak. Don't say we're going to use a needle to give them a shot. Honestly, when I hear this come out of a parent's mouth, I just want to smack them across the face. Thanks. You've now managed to ruin the appointment for your child, my assistant or hygienist, and myself. We have done this hundreds of times. We know what we're doing. Trust us when we tell you how to approach these things.

Bottom line - do you want your kid to be happy or terrified? The majority of the outcome is up to you. Is there the possibility of a bad experience? Of course. Unfortunately they do happen. Are there still going to be some children terrified of the dentist even if the parents have done everything right? Yes. This does happen and sometimes it is very hard to work through.

I can't speak for all other providers, but I know that in my office we work very hard to prevent bad experiences. We listen to the child. We let them guide us in what we can do. We involve them, we teach them and we encourage them. The end goal for me is always a patient who will have a lifetime of good oral hygiene and good dental experiences. Having happy kids in my chair is what really makes my day worthwhile. There's nothing better than going to get a six-year-old from the waiting room and having them yell for everyone to hear "I love the dentist!" (And yes, this has happened.)

Monday, January 23, 2012

Summary Sunday : I Suck at Doing This on Sundays Edition

Ah...second Summary Sunday post in a row done on a Monday. I'm just that awesome. Collin finally made it home late Friday night, so we got a couple of days to spend time together. Thus...no blog post from me. But...I'm back. So now you get the fun.

Last week I recovered from the stomach flu, Collin went to the mine for a week and Darian did some more guest blog hosting. We also got to attend Kirsten's second birthday party. So cute! It's always fun hanging out with Owen & Patti. We also enjoyed the fact that Andrew & Laura were in town. Andrew is Owen's younger brother. He's always a good time.

I get to be Auntie to the cutest girls ever. (I may be biased...)
What else happened? Let's break it down...

Posts I Posted : Darian got featured not once, but twice for his book reviews on the Percy Jackson series. (Sidebar - I now have Three Times a Lady playing in my head. You're welcome.) I also managed to finish another book and unwittingly discovered that I yet again chose a book in an incomplete series. I am occasionally a dunce.

Books I Finished : I am sad to say that for the first time in two years I have abandoned a book. I was reading Bill Bryson's Notes from a Small Island. It was obviously not my cup of tea. I got so bored with it that I just couldn't take anymore. I made it to page 55 before I called it DOA. It gets a 1 star rating since I didn't finish it. It also will not be entered into the 2012 bracket or be counted in the official year's count. Lame. But it does get the honor of being the first book on my "Abandoned" shelf. Ouch. I am now reading The Night Circus by Erin Morgenstern at the recommendation of Patti, who gave it five stars. I am loving it so far.

Projects I Finished : After nearly going hara-kiri on my scanner trying to take pictures of my Project Life layouts, I decided to try something different and built a light box based on Pinterest project I'd seen from Michele at The Scrap Shoppe. I promise...I will eventually actually post some pages.

Recipes I Tried : I forgot to tell you, but a couple of weeks ago I tried the 3 Packet Pot Roast recipe I found on Pinterest. It was amazing! We loved it. Super easy and great tasting. Last week we tried Mini Taco Cups and Chicken Parmesan Bake. Also both fantastic! Two out of the three were Pinterest finds!

Though the Taco Cups are meant to be an appetizer, Darian and I enjoyed them as our main dish. They were fairly simple to make and we both liked them enough to put them in our regular rotation.

Mini Taco Cups :


2 pkg. (30 total) Phyllo Dough mini shells (or fillo...however you want to spell it)
2/3 can refried beans
1/2 can black beans
1/8 c. taco seasoning
Shredded cheese
Salsa (we also used fresh tomato)
Sour cream (optional)

Preheat your oven to 350 degrees. Arrange the phyllo cups on a lightly greased baking sheet. Combine the refried beans and the taco seasoning. Fill each cup 2/3 with the mixture. Fill the remaining space with black beans. Top with cheese. Bake in the oven for 8-10 minutes. Add salsa and sour cream. Serve while hot.

I'm  not even going to tell you how many of these I ate. It's just this side of astronomical.
Favorite Post of the Week : We all know I have an unhealthy crush on The Bloggess...so it will come as no surprise to you that my favorite post was her video on Sopa...and the dangers it poses to cats. I'll admit...I snorted when I read the folder in her hand. Let's be honest. You can never go wrong with Jenny.

FYI...this post officially took me 2 hours to write. I got sidetracked by Jenny's frickin' blog trying to find that link and ended up naming a metal chicken Zsa Zsa van Schnikelbochens. Ah, my nights are fun...

Friday, January 20, 2012

Guest Post : Darian's BOTY


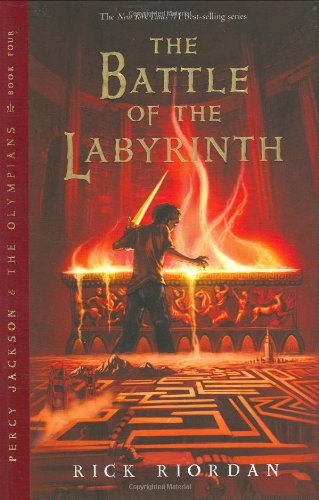
I just finished reading Percy Jackson and the Battle of the Labyrinth by Rick Riordan. I rated this book 4 out of 5 stars. I did that because it wasn't one of my favorite books, but I still really liked it.

This book is Percy's fourth quest, but this time the quest - last the last story - isn't based on him. He just comes along on the quest. This quest is for Annabeth.

In this book, you will meet a lot more monsters and some more characters. As you can tell by the cover and name of the book, it is based mostly in the labyrinth (made by Daedalus). Percy and a group of other characters go through the labyrinth to find out how the Titans are planning to attack the camp. The Titan lord Kronos comes back with a lot of other Titans.

I wish there wouldn't have been as many places in the story because at some parts if you read it at different times you could easily forget where they were. Like one time in the last part they were in the Palace of the Titans and then when I read again they were back in the labyrinth.

I really like this series so far. I'm going to keep reading it. Right now I am reading Percy Jackson and the Last Olympian - the last book in the series. I'm really liking it.

Thursday, January 19, 2012

Let's Shed a Little Light on the Subject

So...as you've seen me mention a few times in older posts, the lighting in my house after dark is uber crappy for photos - especially my kitchen. It's just plain embarrassing. I vowed to do something about it - you know, trying to actually blog during daylight hours instead of jamming things down on the screen before crashing into bed in the wee hours of the morning. But...we all know that will never change. 10pm will always be my "happy time" for blogging. Because it's QUIET around here.

That's why I'm glad that there is Pinterest and that Michele over at The Scrap Shoppe came to my rescue. If you've never seen Michele's blog...well, you should. She's super crafty. She posted a tutorial for making your own home light box out of a cardboard box. Brilliant!

So while I can't promise that all my photos from here on out will be pretty and less tainted by my incandescent lighting, I think there is some hope in the future that there will be improvement.

I followed Michele's instructions (kind of loosely here and there, because I'm lazy like that) and made my light box in about thirty minutes. You can get the whole thing over at Michele's blog, but here's the basics of what I did. (Oh, and her photos are prettier.)


First, I swiped a box from work. It's about a 13x13" box. I wanted that size because ideally I want to be able to eventually take glare free photos of the scrap layouts I can't scan. Ya...we'll see...


Using my handy dandy box cutter, I chopped off the flaps.


Then I drew a rectangle on three of the sides, leaving about an inch of cardboard around the edges. Wielding the box cutter again, I cut out each of these rectangles, leaving one side and the bottom of the box intact. At that point, it looked like this:


After that, I dug out some white fabric to shield the sides. I ended up using what I'm pretty sure was a twin bed sheet from my college dorm room. I have no idea how that ended up in my fabric pile, but whatever, it totally worked. I just chopped a long 14" wide strip of fabric (long enough to cover the three sides).

This is where I start to deviate wildly from Michele. Hers is nice and pretty. I figured no one was going to see it but me so I took a short cut. Instead of cutting the fabric to individually cover the holes, I just wrapped it around and taped the edges down to the cardboard. I will eventually need to add some white posterboard or cardstock to the exposed inside edges, but for now...here's what I've got.


I tested it out a little bit last night using my little desk light through the top panel and I'm happy to say that my pages came out relatively glare free (I removed the white posterboard to slide them into the back of the box). I need to work on my angle so the edges come out straight, but the lighting is much improved. Fingers crossed for better project pictures from here forward!

Wednesday, January 18, 2012

2012 BOTY : City of Ashes by Cassandra Clare


City of Ashes by Cassandra Clare is the second in her Mortal Instruments series. As with most sequels, I didn't find this one as intriguing as the initial book. However, it still had a nice easy flow and the characters continued to be full bodied. The story seemed to have a little more tunnel vision than the first book and not as much was going on beyond the primary plot.

City of Ashes more or less picks up where City of Bones leaves off. As with other series books we all know and love, it's difficult to tell you much about the plot without ruining the first one. I'll do my best...I apologize if I inadvertently give up any spoilers.

Clary Fray is trying to save her mother while also working to thwart the evil plans of Valentine, a powerful Shadowhunter who believes that the destruction of Downworlders (werewolves, vampires, warlocks and faeries) is the only way to make the human race safe. His extreme views don't sit well with the majority of the Shadowhunter world. They believed him to be dead fifteen years ago, but it is clear that he was only biding his time until he could make an attempt to thwart the power of the Clave.

I did like this book. Don't get me wrong. But, I was a little disappointed. I had some issues with the "sophistication" level of the first book. That trend continues with City of Ashes. The book becomes even more juvenile than the first book as the plot moves on. Yes...this is Young Adult fiction and I do expect it to play a little more to a younger set of readers. However, the story becomes more about teenage love and angst and loses sight of the plot every now and then. The writing isn't as powerful as the initial novel and it is certainly a step down from the writing in Clockwork Angel from her Infernal Devices series.

Oh...and guess who made a crappy decision yet again? Yup...as with Infernal Devices, not all books in The Mortal Instruments series have been released. In this case though, I think that might work to my benefit. I am currently reading the third novel, City of Glass, and I am finding that I could certainly do for a break from her writing. This clearly indicates that this series lacks the luster of those like The Millennium Trilogy by Stieg Larsson or the Harry Potter series by J.K. Rowling - books where I couldn't wait to get my hands on the next one. Because of this lack of enthusiasm on my part, I ultimately gave the book a rating of 3 out of 5 stars.

Tuesday, January 17, 2012

Guest Post : Darian's BOTY 2012


I have finished Percy Jackson and the Titan's Curse by Rick Riordan. This is the third in the Percy Jackson series. I gave it 4 out of 5 stars because I didn't super like this one, but I still liked it.

In this book, Percy goes on another quest. Percy receives a distress call from Grover that he thinks he has found two half-bloods. Percy's friend Tyson from the last book has come back. Tyson has been away at Poseidon's palace since the winter. He came back because he had made so many swords for his boss, Cyclops, that he got the whole summer off.

In this book, the quest is to go find the goddess Artemis because she has been kidnapped by the Titans. The Titans are the rulers before the Olympian gods. In this book, you are introduced to a new group of people: the hunters. The hunters are girl half-bloods who have chosen to hunt with Artemis. Two of the hunters come on the quest to help save Artemis.

I liked this book because this one has a lot of monsters, it has pretty good descriptions and it has a lot of new characters. I thought that the monsters were really cool. There was also a lot of action in this book, which made it a lot better than the second book - almost as good as the first one. I would recommend this book to people who like fantasy and adventure.

The next book that I am reading is Percy Jackson and the Battle of the Labyrinth. I am also reading the book Fever 1793 by Laurie Halse Anderson.


I am doing Book of the Year on a bracket. I am putting all of my books down as I read them. At the end of the year, I will compare all of them and decide which one of them was my favorite book of the year. This is what my bracket looks like so far :

Monday, January 16, 2012

Summary Sunday - Soiled Carpet Edition

I have returned to the land of the living. Yay! Stupid stomach bug. Nothing I hate more than a good puke. Now that we've dispensed with all the pleasantries, on with the blog...

So it's Monday, but let's all pretend it's not. It's going to go ahead and be Sunday again, 'kay?

Last week was a rough one, so not a lot got done. That means a shortish write for me and an easy read for you. Perhaps both pluses?

Collin is out of town on shift for the week so it's just me and Dar until Friday night. He left on Saturday early in the morning after working three 24 hour shifts during the week. That made for one heck of a crazy Friday before he left. Add to that a sick kid and life gets really fun.

Darian came home from school sick as a dog on Thursday afternoon. I was off getting my nerve testing done on my arms (which - if you've never had electrical impulses shot through your already sore appendages - is a really good time). By the time I got home he had thrown up three times and was white as a ghost on the couch. Off to bed with him, but then he proceeded to vomit on the floor a couple of hours later. Good times. The cat was also apparently appalled by Darin getting all the attention, so he decided to go ahead and poop on the dining room carpet. Once again, good times were had by all.

The offender. Who is currently residing on my lap...and apparently really likes saltines.
Darian stayed home on Friday. Collin was (thankfully) off work at 8:30 that morning so we tag teamed being home in order to get all of the errands done. Dar was feeling well enough by afternoon that he was picked up by his mom as planned. Collin and I were able to go out with our Christmas gift card from Owen & Patti and have a nice dinner...and some drinks. We so needed it.

Saturday I got spoiled even more. Patti was awesome enough to take me for a pedicure after I accompanied them out to take photos of her adorable daughter who is turning two in a few days. It was LOVELY!

Unfortunately, that relaxed and wonderful feeling was ruined about 3 hours later by the appearance of Darian's gift to me...the stomach bug had returned to the house. I spent Saturday night and the wee hours of Sunday morning hurling out what was left of that afternoon's lunch. Not cool. I spent the rest of Sunday in bed and my stomach still hasn't quite returned back to normal. On the bright side, I did discover that Picabo has a penchant for saltines. He practically attacked my hand trying to get one for himself. Weirdo cat.

Alright...so what did I accomplish before the joy of illness struck our home? Not a lot. It's sad...

Posts I Posted : Darian reviewed his second book of 2012, while I showed the scarves I made for Christmas, gave a review on City of Bones and demystified the TLC naming question.

Books I Read : In addition to City of Bones, I finished City of Ashes which I will be reviewing later this week. I also realized a large mistake...yet again. This series has not been fully published either. Criminy! I initially thought that there were only three books in the series. I was wrong. There are six. Drat. I have books 1-3. I need to get book 4. Book 5 will be released later this year and book 6 will be released next year. Seriously, I need to start doing better research before I read.

I have also spent some time over the last week prepping my "to read" list. I've been organizing my e-books and getting things together so I can get an idea of what to read next. There are a lot of good choices.

Darian also informed me earlier today that he has finished his next book, so he will be posting a review this week as well.

Projects I Completed : Well...this week was an utter failure. I attempted to scan my Project Life pages and  the results were dismal. Without a wide format scanner, getting the whole page is quite difficult. So...I tried photographing them. Once again, a big batch of fail. Glare everywhere. So...before I was sidetracked by my stomach's staged coup, I was planning on making a light box this weekend. That project has gotten pushed to this week and I hope to have photos ready of both the Project Life and Smash pages by this upcoming weekend. I'm also keeping my eyes peeled hoping that the Pocket Pages I need will come in soon...it's putting a kink in the works.

As for the rest...well...laziness ensued. I'll admit it right now. I did finally get caught up on reading blog posts though so I will be able to share some great blogs and posts in the upcoming weeks. Yay!

Now...I think it's time for some wine and Netflix...ok, maybe water...I don't need revolt part II.

Sunday, January 15, 2012

There Has Been a Revolt

Thanks to a wonderful stomach flu that Darian apparently brought home to share, I'm spending my day in bed with my pillow and my Nook. So...this week's Summary Sunday post will be postponed until tomorrow, as will my plan to make a light box for photos. Ah, the best laid plans...

Saturday, January 14, 2012

You've Been Framed

I always try and give our moms something homemade for Christmas. I just think that homemade presents are so much fun - both to make and to give. This year I went the photo route for both moms.

Project 1 : "I Love You" Frame


This one I made for Carole based on an idea I got from Pinterest. We try and keep her up to date with photos, but sometimes we fail miserably...like the fact that I just gave her photos from last Christmas while she was here for this Christmas. Oops.

The gift was fairly simple to make, but should look good next to her other photos of Dar. I used a regular 8x10" photo frame with 5x7" cream mat. I printed the photo from our family trip to Yellowstone this past summer. I used black and white so that the whole scheme would tie together. Plus, I just like black and white for display photos because then they can more or less go in any room.

The "I Love You" letters are actually fabric stickers. I use them for scrapbooking, but I thought they looked super cute here.


Project 2 : "Love" Shadowbox


For my mom I typically use things from our childhood...like the photo frame I made for her a few years ago with our baby pictures and a "T", "L", "C" for our initials. (No, my parents did not name us just so that would come out like that.) Sadly, I don't have a photo of it to show you...lame, I know.

This year though, I decided to do a recentone with the family. I used a large shadowbox frame with a front opening hinge. I then framed our family photo in an 8x10" mat and a photo of Marley in a 5x7" mat. I adhered both of them to the linen backing. Unfortunately, my adhesive choice was crappy and they came loose after wrapping. I would suggest using double sided foam tape instead of the scrap adhesive I used.

Finally, I had a large chipboard "love" in my stash. I thought the whole thing could use a little bit of color so the bright red just works out well. There are accent pins to the top right and bottom left of the "love".

See...not too difficult, but still semi-creative (I like to think) and somewhat sentimental. That's the kind of gifts I prefer to give when I can.

Tuesday, January 10, 2012

2012 BOTY : City of Bones

Apparently I'm on a serious kick of YA books and have some kind of addiction to sci-fi/fantasy fiction. I never thought I'd find myself saying that. But, after I finished Clockwork Angel by Cassandra Clare and realized that not all of the books in her Infernal Devices series had been published yet, I decided to move on to her other series, The Mortal Instruments. i liked her storytelling and the premise had me curious. I'll admit it. I was skeptical at first, but it reeled me in.


City of Bones is the first book in the series. Clary Fray and her friend Simon are at the Pandemonium Club when Clary spots a strange looking boy in line. She notices  him being followed and soon finds herself in a closet watching three other teens attack and slay the boy. She watches as his body folds in on itself and disappears.

The other three teens in the room are stunned to discover that Clary can see them and could see the boy...who was actually a demon. Unlike other mundanes (basically Clare's version of muggles), Clary can see through the glamours of the Shadowhunters and can see them for what they really are. She can see demons and creatures of the Downworld. This is obviously not normal and heightens the Shadowhunters' curiosity in Clary.

The next day she is at a coffee shop with Simon, when she notices Jace, one of the Shadowhunters from the nightclub. She follows him out only to get a panicked phone call from her mother telling her not to come home. Rushing back to her apartment in order to see what is wrong, Clary is met with a demon and soon realizes that her mother has disappeared.

I rated City of Bones 4 out of 5 stars. It is a little more "youthful" than books I typically read, but I would put it somewhere along the lines of a Harry Potter style read. This one is less appropriate for pre-teens though, as there is some sexual innuendo and language use that might be above their age level. I won't be allowing Darian to read it just yet.

Having read Clockwork Angel, I can tell you that the premise for the start of the two books is fairly similar. The most glaring difference? Clockwork Angel is set in the 1800s. City of Bones is set in present day. The main characters, however are very similar. Girls with special talents who thought themselves to be "normal" prior to their exposure to the Institute and the Downworld. I also found that City of Bones seemed to be slightly more juvenile. This doesn't mean that I didn't like it, but it was definitely less sophisticated than Clockwork Angel.

I have to say though, I like Clare's style of writing. She does well with detail and keeps the story moving with multiple plot lines and conflicts. Though the book leaves you somewhat hanging, it's not a painful cliffhanger. Do I want to read more? Yes. Would I be absolutely distraught if the next book were not immediately available? No. It's not an open ending that left me frustrated and angry like some others have done (I'm looking at you My Name is Memory). Even though there is no finite ending, there is a comfortable sense of resolution.

What it really comes down to is that if you enjoyed the Harry Potter or Percy Jackson books, you will most likely enjoy this one. It's a fairly quick read and certainly boring in no way. I am looking forward to moving on with the series and am now reading book 2, City of Ashes.


* * * * * * * * * * * * * * * * * * * * * * * * * *

Since I've now reviewed an rated three books for the year, I figured that it was time to break out the bracket. Obviously it won't be very filled in yet, but it's a nice teaser for where I'm headed. I'm planning on including an updated bracket for every 3-5 reviews, just to keep things from getting monotonous.  And, as usual, if you have any book suggestions for me feel free to leave them in the comments. I'm open to new things!


...and don't forget to check my other reviews as well as the list of books on my "to read" shelf over at Goodreads!

Monday, January 9, 2012

In Stitches

Last week I gave you a preview of the projects that made up the Christmas Project Countdown. As you no doubt noticed, there were quite a few scarves.

I feel like I'm finally starting to get the hang of this knitting thing. Now...that being said, I know I still have a long way to go.

But...considering that my skills started off with some miscalculation and this, I think I'm doing alright.

I've talked to you before about the fact that I'm all about taking the easy way out on things. So all of these scarves were knitted using a knitting board (loom). I have no desire to mess with needles. I'd probably just stab myself.

For the scarves, I used one that looks an awful lot like this :


I found that it's rather relaxing to do this while half watching a television show. I got through quite a few episodes of My Boys

The first scarf I made was this one : 


Originally I didn't know who I was making it for, but as I worked on it I realized that it just looked like it would be fitting for Collin's grandmother, Jean. Turns out...I was right. She sent us a thank you note the other day saying that she really likes the color. Score!

The best part about knitting these scarves for Christmas was that I got to try different types of yarn. For some of the girls' scarves I used angel hair yarn. This is typically a double stranded yarn. It's soft and pretty, but it can prove occasionally problematic if you're not paying attention to the strands.


This yarn is so soft in fact, that it prompted me to tweet this.

The softest yarn though was the one I used to make a scarf for my dad.


This is crazy heavenly. It's Goldenrod by Sensations. It's like a fluffy cloud.

I also played with some fun color combinations to see how the patterns came out. 


I really enjoyed how the pattern ended up coming out on Jon's scarf...a nice diamond motif.


I ended my endeavor by learning how to blend different yarns to make a pattern. I goofed up and don't have a good picture of it, but you can kind of get the idea...


I made that one for my grandmother. She's the knitter/crocheter in our family. She has made me some really beautiful afghans. And that brings me to my goals for 2012...

I'm going to keep working at the knitting and trying new things. I still have to break out the crochet hooks and learn that skill, but that's another story. For the knitting I have two 2012 goals. I want to make an afghan and I want to knit myself a pair of fingerless mitts. My hands always get crazy cold, so it would be really nice to have those handy. (No pun intended, but it certainly worked out that way.) I'm hoping to start on them soon (I need to go pick out some yarn) and have them finished by February at the latest. The sooner, the better. My hands will be very happy.

Also, Erin's girl loved her mom's scarf so much that I've decided to make a girly one for her. She's requested fuchsia so I'll be picking up some of that as well. Maybe I'll even try and learn a new stitch. Hey! Look at me branching out!

*** If you want to see an idea of the projects I'm thinking about trying this year, check out my Pinterest. I have a specific board out there just for knitting that I'm hoping to add more ideas to. ***

Other Posts You Might LIke

Related Posts Plugin for WordPress, Blogger...
01 09 10 11 12
Blogging tips