Showing posts with label Coasters. Show all posts

Thursday, April 3, 2014

"C" is for Coasters


It's day 3 of the A-to-Z Challenge. Things are going pretty swimmingly so far. Today's letter is...


In EPJ land, C is always for coaster. I've become somewhat famous (or maybe notorious) among my family and friends for my coasters. My bottlecap coasters are one of the most popular posts on the blog. Even two years later, it still gets one of the highest number of visitors each week. Crazy.

But today is not about bottlecap coasters. It's a different kind of upcycling. I'm all about reusing stuff for my crafts so I don't have to go out and buy anything. It's called frugal, people...it's not hoarding. Okay...maybe it's a little bit of hoarding. The crop room closet is a mess...I'll admit it.

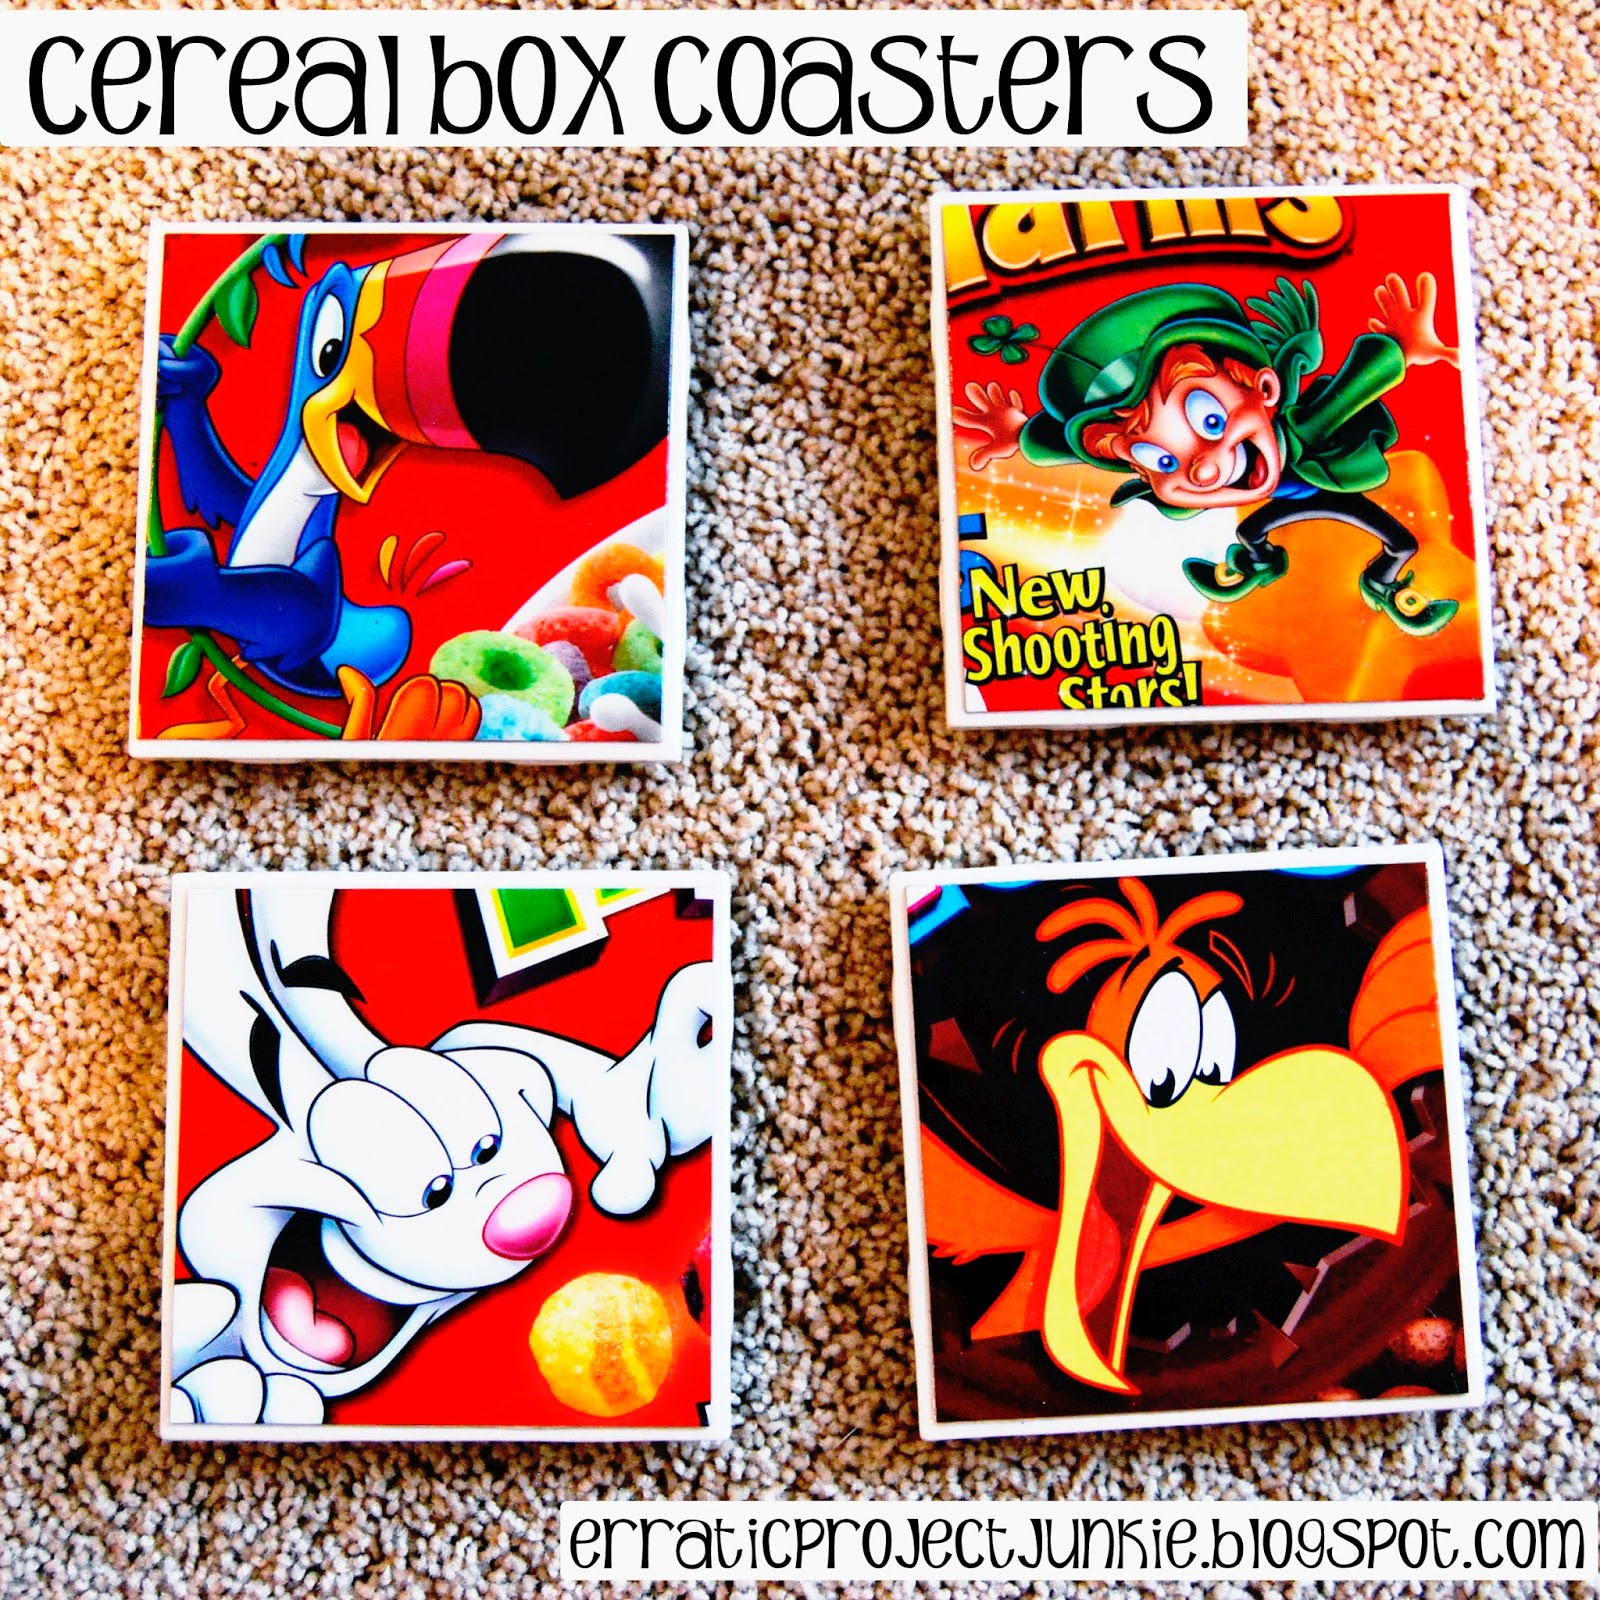
A couple of years ago, I had the boys start saving our cereal boxes. I didn't have a plan for them at the time, but I figured they would come in handy for something. I thought maybe I'd use them to make magazine holder style boxes. I didn't think I'd use them like this. Sometimes ideas just work out.

Sunday, March 9, 2014

Summary Sunday: I Hate Being Sick Edition

Well...it's been an interesting week. Guess who got sick...again? Ugh. This time it's some sort of sinus disaster. Not my idea of a good time. I've spent the last three days (yes...my ENTIRE three day weekend) in bed. I'm pretty irritated by the fact that none of the craft projects I had planned are getting done - not to mention the fact that I now have to try and figure out how I'm going to rearrange my blog planner. Ah, the downside of trying to be organized.

Now I'm having an OCD breakdown over the fact that the planner is written in pen - PEN, people! - and it won't be accurate. Seriously. You have no idea how much that bothers me. I'd say that I'd go back and redo it and put it in pencil this time, but pencil bothers me too. All the smudgyness? That's not okay. There's just no winning.

So this week's Summary Sunday is going to be pretty short and sweet. Because I accomplished next to nothing. Again. It's getting old. Thank goodness I'm on the mend because there will have to be some SERIOUS crafting this week. That day off I have coming up on Wednesday? Ya...other than the glorious massage I have planned, there will be some sewing and paper crafts happening. Beware the typhoon of crafting that will occur!

Now...let's get down to brass tacks...

Posts I Posted : In terms of quantity, this week sucked. I only posted once. That's a low for 2014 thus far. I'm mildly ashamed. I should have at least tried to dig a draft out to throw on for you guys. But...I will say that the one post I did was a good one.

We celebrated my niece's birthday this week. She turned 3.

How adorable is this little princess?
We went out as a family and she whooped us all at bowling. I'm not kidding. The kiddo scored 117 and beat the other six of us. Okay...so she had a little bit of help in the bowling ramp, but still.

Anyway, I made her birthday present and it ended up being the only post that made it on the blog this week. Thank goodness that project was a cute one. In fact, this may be one of my most favorite projects ever. I give you...Barnyard Hand Puppets.


Seriously, these were so much fun to make. I didn't even have to curse at the sewing machine once. That has to be a record. I'm currently drawing up plans for some additional hand puppet ideas. They'll probably debut sometime in the late fall (Miss M turns 4 in November). We shall see...I may not be able to restrain myself for that long.

Books I Read: This is the category where being sick actually paid off. I am ON TRACK with my Goodreads goal for 2014. Not only am I on track, but the books I finished this week will both be in the running for 2014 Book of the Year. Color me amazed! Let's see how long I can hold on to that one.

I finished two good books this week and I'm currently in the middle of what I think will be another winner. I completed Rapture by Lauren Kate, which was really good except for one flaw that almost made me quit the book altogether. I'm glad I stuck it out because this fourth book in the Fallen series actually ended up being better for me than either the second or third.

Speaking of series books, I also read Where She Went by Gayle Forman. It's the sequel to If I Stay, which I read back in 2012 (and apparently never finished reviewing on Goodreads. Oops.) Well, here's the thing. I really enjoyed If I Stay. But...I liked Where She Went better. That is super rare for me on a series book. I think I just enjoyed Adam's character a lot. Plus, I think being sick put me in more of an emo-type place, so his angst totally worked for me. Whatever the reason, I LOVED this book.

And now...well, now I'm reading Amy and Roger's Epic Detour by Morgan Matson. So far, I really like it. I'm expecting that it will be finished quickly. Last night I only gave it up because my Nook was running out of battery power and (thanks to the time change) it was 3 a.m. Ya...a little later than I planned on, but my schedule is all messed up with all of the sleeping I've been doing over the last few days. It's going to make going to work tomorrow at 8 a.m. just that much harder.

Recipes I Tried: It was a week of easy meals at our place. Monday night was burritos. No, not frozen ones...I actually made them. Tuesday night was Darian's favorite, Waikiki Meatballs. I should probably share that recipe at some point. They're delicious and super easy to make. Wednesday...hmm...what did we have Wednesday. Oh! I lied. Wednesday was Waikiki Meatballs. On Tuesday night, Collin made Alphabet Noodles and used up all of the cheese, so I couldn't make the nachos I had originally planned for Wednesday. (We're still obnoxiously out of cheese.) In case you're wondering, Alphabet Noodles are really just a homemade version of Spaghetti-O's. They're not that fancy. But it's nice when he cooks, because it means I don't have to. After that, it's just been leftovers and eating out. We had pizza at Miss A's party and then I've been sick. Collin picked me up some Costco chicken noodle soup yesterday and that was lovely.

Projects I Worked On/Finished: Well other than the aforementioned Barnyard Hand Puppets, nothing got finished. I'm really quite bummed about that. However, I did (with Collin's help) make some progress on the crop room. You can actually see both the table top and the carpet now. It's just this side of a miracle. Now the real work begins. I had Collin drag my paper racks into the garage so I can get them sold and have some money to put towards new cabinetry. I'm in the midst of trying to figure out exactly what I want in there. I think Collin is on to something though, he suggested a table top on the western wall that would eliminate the sewing machine cord from the floor (which would be awesome) and maybe a couch under the window to make it a little cozy. He also suggested a larger TV. I'm totally down for that one. We'll see what happens. I can tell you that the project will not be finished this month as I had originally hoped. The dead heater has seen to that. Stupid money pit of a house.

Favorite Pin of the Week: I'm a little sad to say that not a lot of pinning happened this week. For all the time I spent at home, not much of it was surfing the web. Shocking, I know. And so I have to go a little less classy than I had hoped for my favorite pin this week. Less classy, but hilarious. And I'll apologize beforehand because this pin is just a picture, it doesn't really go to the source. So you just get the link to my actual Pinterest pin for the most awesome coasters ever.

Ya...I laughed out loud at these. I particularly like the top left one.
So hopefully next week goes a little more impressively than this one. It's been a sad start to March. I need to get myself back on track and at least do a few things that apply to the theme.

I also need to get on the ball and start preparing for my April posts. That month is going to be interesting. I'll be starting the A-to-Z Challenge on April 1st, which will end up requiring a post every. single. day. of the month thanks to Summary Sundays.


I'm a little scared.  The good news is that there will be a crafting post on every day that month. The bad news is that I need to get photos organized and remake a couple of projects that are missing photos before April 1st hits. It's going to be a LOT of work. No more time for being sick! Let's get this crafting show on the road!

So much for being short and sweet. Apparently, if you coop me up for too long I can't stop myself from rambling. Maybe I can channel all this new found energy into something productive in the next few hours. Here's hoping!

Tuesday, January 31, 2012

Coastin' Along (Part II) : Decoupaged Tile Coasters

Yesterday I told you how to make the "man" project bottlecap coasters. Do I like those coasters? Yes. But...personally, I like my coasters prettier. So for the girls (Patti, Krista & Carole), I made decoupaged coasters. Patti & Krista got decoupaged paper coasters and Carole got the uber fancy decoupaged photo coasters.


As with my other Christmas projects, I had a major fail in the photo department so I had to recreate the projects to get my tutorial pictures. Don't worry...I'm learning my lesson. Next time, photos will be taken as I go. I'm more or less telling you this so that you won't freak out when the beginning and final photos aren't the same as the "in progress" photos. Deal with it people.

For this project, you'll need :

Ceramic tiles (you can get these super cheap at Home Depot or Lowe's; I paid $0.11/each for mine).
Paper and photos
ModPodge
Foam brush
Clear coat (not pictured, but I used automotive clear coat)
Adhesive felt pads


First, cut your paper and photos to the match the size of your tiles. I approached this two different ways: some I cut to the exact size, some I cut slightly smaller. I advise cutting them slightly smaller - this seems to help the edges seal better.


Any ModPodge will really do, but I chose the glossy. To adhere the paper/photos to the tile you can either apply the ModPodge directly to the tile

This is the underside of a tile. If you look close, you can see the ModPodge streaks.

All tacked down. Seriously, how pretty is this girl?

or to the item you're adhering.


I think I tended to get a better result when I applied it to the tile. I seemed to get more wrinkles with the paper application (note the bowing in the above photo).

Once the paper/photo is glued down, coat the top with more ModPodge. I did about 3-5 coats. Don't panic when you do this. It will go on white and goopy, but it will dry clear.


Try to apply it as smoothly as possible, but don't worry about streaks that may develop. It'll be okay. I promise.

(See...blending in.)

Additionally, on the photo tiles, the ModPodge may pull up some ink. In my case, I've done all of my photos in more of an antique coloring. I honestly can't tell you how full color or monochrome photos will do. In my case, they dried out just fine.

Calm down and breathe. It'll be okay. See...the Minnie ears are already clearing up.

Let these dry fully. (I suggest overnight. And don't be checking them after four hours with your fingers people. Be patient.) In my experience, the paper ones tend to dry faster than the photo tiles.

After 3 hours.

Also after 3 hours. Note that there isn't a red issue in the drying areas.

Once they have dried, apply the clearcoat. I did this out in the garage. The fumes are, of course, awesome. Do these coats rather thin. This will prevent bubbling. You can add additional layers about every 30 minutes to an hour. We did three coats and then left them in front of our fireplace for a few hours. Collin then blasted them with another four to five coats the next day. He went a little overboard, but I admit they came out awesome.

Ooh...shiny.

If you run into bubbles, don't panic. I had that happen on a couple of them when we put the clearcoat on too thickly. Collin helped me solve the problem (mostly because I had a rather crazy panic attack). He wet sanded the areas to remove just enough clearcoat to get to the bubbles. After that, he just started over again - this time with THIN layers.

Bet you can't guess which two were wet sanded and repaired...I can't...and I made them.

After the final coat of clearcoat has dried for at least 24 hours, apply the adhesive felt pads to the underside corners. I put mine about 1/2" from the edges. Let the tiles cure for another 2-3 days in a warm location before stacking them, using them or putting anything on top of them. Stacking them early will result in imprints. (Hint: Your fingertips will also do this. DON'T TOUCH. Resist the urge. I know you can do it.)

And when you're all done, they should turn out nice and pretty and everyone will love them. Well...I will at least.

We can occasionally be a presentable family. Oh...in case you can't tell...we like our sunglasses.

Monday, January 30, 2012

Coastin' Along (Part I) : Bottlecap Coaster Tutorial

For those of you curious about last night's dinner adventure with the sesame chicken, here's the review. Darian loved it. Collin was okay with it. I didn't fare too well with it. It did not make the cut for our regular rotation.

That being said, let me inform you of one disclaimer: I don't so much like chicken. Chicken nuggets, sure. Chicken from a can, no problem. Chicken breasts or chicken actually still on bones? Did you just see me do a full body shiver? Eww. With the chicken breasts, it has something to do with the dryness of the meat. The texture gets to me. And chicken still on bones...umm...hello...bones. No thank you. Now I can handle beef and I can handle pork, both with bones. I draw the line at chicken. I know that's weird, but it is what it is. If we have fried chicken, Collin has to pull it off of the bones for me.

But...speaking of picky eaters, my friend Michelle over at In Search of the Sidewalk wrote about her peculiar eating habits yesterday. She's making me feel better about myself.

Now, back to what I really intended to write about today. Remember those Christmas projects I did? Believe it or not, I'm actually going to teach you how to do one of them. Shocker isn't it?

Today's project : Bottlecap Coasters


How awesome are those? I mean really, come on. I love them. I made a set of four for each of my brothers and one for Owen. They seemed like pretty decent guy presents.

Having enough bottlecaps to make these and have such a varied number of brews is tricky, right? Well, I've had a serious stash of bottlecaps for years. And how did I come across such a wonderful collection, you ask? It's all about who you know. My younger brother attended one of the nation's universities most noted for their partying. Score. When bottlecaps started to get popular in scrapbooking about, oh seven years ago, I asked him to save them up for me. Thus, three large tackle boxes shoved full of caps from a whole lot of different beers. (I won't judge his roommates by the fact that there were Mike's Hard Lemonade and Zima caps in the mix.)

And so they sat in my scrap closet...for years...gathering dust...until I came across this gem on Pinterest. I found two problems with these. 1 - I don't buy stuff that I can make. That one is pretty obvious. 2 - Theirs are held together with steel wire. I wanted something with a base. So...I set out to devise my own system.

Here's what you'll need for my method :


1. Caulking gun
2. Silicone or construction adhesive
3. Acrylic sheets (found at any hardware store)
4. Acrylic knife
5. Adhesive felt pads
6. Bottlecaps (duh)

Now don't try and be all smart and think you can just use a craft knife. Nope. Doesn't work. Trust me - I tried it. Badness and cursing ensued. And I'm not talking X-Acto Knife. I'm talking one of these :


You might also want a cutting mat and a heavy duty (read: metal) ruler.

First peel the protective coating off of the acrylic sheets. These will most likely be on both sides. Then cut your sheets to get a nice pile of 4x4" squares. Don't worry about the edges being perfectly square...we'll fix that later. If you do worry about them being square, well then this project is going to take you a while. Good luck.

How artsy is this picture?
Now that you have your bases cut, it's time to pick out your bottlecaps. I highly advise washing these first so you don't have stinky and sticky beer residue to deal with. I put mine in the silverware rack of my dishwasher and blasted the crap out of them. Tada.

Pick out nine caps for each coaster. Line them up to figure out your configuration before you start to adhere them.


Now it's time for the messy and smelly part. Seriously. I nearly got high making these. Remember this tweet? Ya...I was working on these.

So, keep little hands out of the room and pull your hair back. Please don't wear nice clothes. You don't have to be prepared as if you were painting your ceiling, but don't be dumb and wear expensive jeans or your favorite t-shirt ever. Your hands will be covered in ickyness. (Yes, I'm making that a word.) Oh, and another tip. When you open your adhesive, make sure to puncture through to the back end of the tube (I shoved a wire hanger up through mine), otherwise your hands might just fall off from trying to squeeze the crap out of the tube.

You can technically start anywhere, but I like to glue down the center cap first and then work around it. Don't worry about being evenly spaced from your edges, but get it close.

Fill the cap with adhesive.
Now you can just smoosh it down on the acrylic at this point, but I found that I was getting some air bubbles underneath. So I took to flipping the cap over and wiping it against a spare piece of posterboard I had hanging around.
Now that the cap looks pretty and filled, squish it down onto the acrylic. You'll want to get it into position fairly quickly so that it doesn't get stuck in a weird spot. Continue to add the caps one at a time, with the sides touching. You should end up with something like this...


See that extra goo all over the place? If you used silicone, no big deal. It peels off with the use of a small tool (I used some broken dental instruments I had around the office). If you use adhesive...keep some Q-Tips (some wet, some dry) handy and remove the excess as you place each individual cap down. The adhesive is a bit more difficult to remove cleanly.

If you've filled each cap properly, the underside will look like this.


Okay...now it's time to get creative. In order to smooth my edges, I used my Brassler and lathe at the office. Basically, it's a Dremel. It worked pretty darned good. It also made a huge mess that I apparently left all over the floor for my assistant to clean up on Monday. Oops.

Now you'll have Coasters with lovely smooth edges.


Lastly, you'll need to put the felt pads on the bottom to keep them from roughing up tables. Just peel the backing and stick them down to match each corner cap. That way they're hidden from view and nicely balanced.

Let these babies air out for a while before you use them. Otherwise you'll be getting a buzz on top of your buzz. I'd say 3-5 days.

Also, a few other helpful tips. Beer bottles : good. Tumbler glasses : good. Wine glasses : BAD. OH SO BAD. I very nearly shot a wine glass off of one of these puppies over at Owen & Patti's house. 

Additionally, if you used the silicone, the caps can come loose if the acrylic is flexed. Don't panic. Hold the offending cap in your hand for a few minutes to warm it up and then squish it back down nice and hard. Tada!


See...wasn't that fun? Now we have some manly coasters. I'm planning on assembling some for ourselves to keep in the still to be constructed bar in our basement. Nothing like having all the accessories before you have the furniture. Whatever.

Oh, and don't worry...I have girly coasters coming up next...

Wednesday, January 4, 2012

Projects Past

Well...I've put it off as long as I could in order to try and get the last person her gift before I posted this, BUT she's decided not to come back until Saturday. So...she has been blog banned until she opens her gift.

The rest of you get to see what those 40 projects for the Christmas Project Countdown were all about...

Today I'm just listing each project along with a photo and the name of the person who got it. Individual posts and tutorials for each project type will follow over the next couple of weeks.

Now...here's a small disclaimer. These are not the best photos. I took pictures of the projects right before we wrapped them. I was in the midst of Emily's project and time was ticking down so they don't look awesome. But they work. Also...I majorly failed to take pictures of a nice handful of them before wrapping - so you get a picture of the people with their gifts. Oops.

Now...for the 40 projects of Christmas I ended up with...


Presents 1 & 2 : Emily & ME - Advent Calendars

You saw these back quite early in the game. They were the result of a Pinterest find.

Present 3 : Carole - I Love You Photo Frame


Presents 4 - 9 : Carole, Collin, Krista, Darian, Abigail and ME! - BSU Hats

You've already seen these on my December 10th post. Well...except for Carole...who managed not to get her picture taken.


Presents 10 - 16 : Grandpa, Dad, Tyler, Chad, Jon, Kirsten & Marley - BSU Hats

Kirsten managed to go without getting her picture taken.

Jon was the only one of us on Collin's side that didn't get to go to the game. So he needed a hat too...
These are the true BSU fans on the far left and second from the right.
The far right - Tyler - is actually a Vandal (we won't hold it against him today.)

Present 17 : Mom - Love Shadowbox


Presents 18-26 : Jean, Mom, Dad, Jon, Krista, Patti, Melissa, Erin & Grandma - Scarves


The very first scarf I knitted. I don't think it's half  bad.


I love the colors on my mom's scarf. It should go with just about anything. My dad's should be able to go with his BSU gear fairly well and it's SUPER soft.


I love the diamond pattern that ended up coming out on Jon's. I was a little worried about it when I first started. In our house we all agreed that the one on the right was "Krista colors".


I took Patti with me shopping for supplies for this undertaking. She unknowingly picked out the yarn for her own scarf. Melissa still hasn't opened hers yet, but I think the bright colors fit her personality.


Erin was the first one to jump on and comment that I should make it 41 presents because she needed one too. Ha! She was already on the list.

I really wish I would've photographed this one. This is my first attempt at multiple yarns. I really like how the pattern turned out. Unfortunately, you get a slightly blurry idea. I wanted to give this one to my grandma because I knew she would appreciate the effort - she herself does some wonderful crocheting.

Presents 27 - 29 : Owen, Tyler & Chad - Bottlecap Coasters

(I'll be honest...I don't know who got which set. Pretty sure Chad's are the top ones, the Tyler's, then Owen's. I could be completely wrong.)


Presents 30 & 31 : Krista & Patti - Decoupaged Tile Coasters

These I know! The pink/red set is Krista's.


These funky shapes and colors just seemed more Patti-like.


Project 32 - Carole : Decoupaged Tile Photo Coasters

This photo isn't blurry FYI. I antiqued the photos.

Project 33 : Collin - 52 Things I Love About You Card Deck


Don't worry...this one is at the house. There will be better photos of it in it's own post.

Projects 34-36 : Marley, Kirsten & Abigail - Sock Monkeys


 Projects 37 - 39 : Kirsten, Abigail & Marley - Patchwork Name Quilts


...and...

Project 40 : Emily - Alphabet Soup Quilt


Not a bad haul, right? Now you see why I said my sewing machine was busy. It was fun, but I think next year I'll get a bit of an earlier start. Live and learn.

Other Posts You Might LIke

Related Posts Plugin for WordPress, Blogger...
01 09 10 11 12
Blogging tips