Showing posts with label Holiday Decor. Show all posts

Wednesday, November 26, 2014

Thanksgiving Day Banner


Tomorrow is Thanksgiving for us Americans. If you remember, earlier this year I made a goal to make new decor for each season and major holiday throughout the year. I've succeeded so far, other than not making anything specifically for summer/4th of July. I'll get that one next year.

I shared my two new fall decorations last month, but neither of them was specific to Thanksgiving. Since according to Darian, I "always make one of those", I decided that we needed a mantle banner.

This is a lazy post about it...meaning that I did not take very stellar photographs documenting the project. My apologies.

I cut out a few circles with my Pazzle and then topped them with inner circle stencils (also made with the Pazzle). I strung them up with some yarn and used a few decorative paper clips to add a little sparkle and also weight to keep the individual letters from flipping around.


I have some letter blocks partially completed in the garage that will spell out "Give Thanks" where the "Family" sign currently is, but they won't make it for this Thanksgiving. The good news is that they're double sided, so they might make it for Christmas, we'll see. The project load is getting pretty heavy over here, so I might be too tied up to get to them.


Speaking of, I'll be putting up the Christmas Project Countdown for this year sometime in the next week. I'm still finalizing some plans so that I know exactly how many items I'm undertaking. It's looking pretty frightening, but a few of the projects will require Collin's participation, so that might lighten the load a little.

For now though, we're just prepping for turkey day. We'll be spending the day with my family and the evening with his. As far as cooking goes, we're in charge of the stuffing at my family's meal. I'll be making Spicy Chorizo Stuffing with a recipe from Devin at Salt and Pepper Moms. I made it last year and it was delicious! Here's hoping it turns out as well this year.

I'm looking forward to relaxing and spending some time with my family. I hope all of you have a wonderful Thanksgiving. And for those of you outside of the U.S., have a fantastic Thursday!!

Friday, October 17, 2014

Fall in Love with Fall

Yesterday, I shared a couple of pieces of Halloween decor that I put together over the last week. Today, we're moving forward to two more pieces that will be put up for fall decor once the Halloween decorations come down on November 1st.

My fall decorations are pretty slim pickings. It's a little sad. When I made the pledge earlier this year to make decorations for each major holiday, I knew that Thanksgiving and fall would be the ones that needed the most help. (Of course, I kind of goofed up and forgot all about 4th of July this year, but we'll just pretend that didn't happen.) I still need to do a Thanksgiving banner for the mantle, but these two pieces will help me get started.

(Once again, Pinterest was my friend. Sometimes my brain just isn't crafty enough to come up with new ideas.)

Project #1 : This one was an idea from Daily DIY Life.


I have a bunch of these bottles hanging out in the garage from our wedding (and my brother's wedding before that). My sister-in-law and her mother put them together using jute and hot glue on beer bottles. All I had to do was add some cut out shapes and letters and tie them on with some decorative fiber. Easy peasy.


Project #2 : This cute idea was courtesy of Maggie from The Love Nerds.


Once again, another leftover cabinet shelf. I seem to have a lot of those. Spray paint followed by ModPodge on cut out cardstock lettering (I used my Pazzle). I let that dry and then coated the top with another layer of ModPodge. After a night of curing, I blasted the front with a layer of clear coat. Now it's all ready to put out on November 1st.

Now...to decide what I want to do with my mantle...

Thursday, October 16, 2014

More Haunted for Your House

After two weeks and an unfortunate debacle with spray paint, I've finally managed to finish up some seasonal craft projects. Believe it or not, there are actually FOUR new things made for around the house. Since I decorate my house for Halloween and then separately for fall/Thanksgiving beginning on November 1st, I've separated the projects into two posts of two projects each. Handy.

I will be straight with you on these ones...not a single one of these projects started in my own little brain. Nope. Through the wonders of Pinterest, I found some great ideas that allowed me to create some projects of my own. So...while I'm sharing my results, I'm still going to be letting you know where I found the original ideas. I love Pinterest.

I originally started putting these things together for two reasons:

#1 - I needed to do some crafting that didn't involve cutting tiny pieces of felt for hand puppets. I currently have two sets of them in progress and I was getting a little fed up with all the teeny tiny clippings. So I left it for now.

#2 - I can always use more Halloween decorations. Plus, my fall/Thanksgiving stash is pretty small. That needed to change.

Then I happened on another great reason: a way to distract me away from having to put up the Bat Mobile (I still love calling it that).


Last year, I put it up wrong and tied my strings to the chandelier so that they had to be cut down instead of just being able to lift them off. Dumb. So this year I'm going to have to restring everything before I stand precariously on the ladder in our foyer to put them up. October 16th and the bats are still sitting on the dining room table instead of being hung. I'll get to them...promise...

The good news is that my laziness means projects for you to see!

Ready?

Both of these projects were done on leftover cabinet shelving that I had laying around the garage. I spray painted them and then ModPodged cardstock lettering. I would've used vinyl, but my stash is sadly low. This wasn't too much more difficult, just a little messier since I had to put the ModPodge on each piece rather than just sticking down a piece of adhesive vinyl.

Once that dried, I coated with a layer of ModPodge and let it cure over night. One last blast with a coat of clear coat and they were all done.


Project #1 : "Happy Haunting" Sign based on this one seen over at Sherri's Jubilee.


I tracked down a couple of clip art pieces for the broom and cat and cut them out using my Pazzle (a locally made version of a Cricut or Silhouette).


Project #2 : Cute creepy sign based on this Etsy shop item from Country Workshop. (You should go check out her stuff...it's really cute.)


The spray paint "incident" left some rough patches over the top. I was going to sand them back down and repaint, but decided that it looked like spiderwebs and added to the piece. I distress painted over these areas with white acrylic paint, coating the area and then wiping the excess off with a cotton ball to leave a wispy area behind. (It looks better in person...it came out a little odd in the picture.)

After that, I added on the lettering and continued with the work.

Tada! Two more pieces in my crazy Halloween decor collection. Now...I just need more surfaces to sit them on...

Wednesday, September 10, 2014

Football Season Mantle


Are you ready for some football? (How sick are you of hearing that phrase around the blogosphere?)

Ready or not, football season is upon us. Around here, that means Boise State. We love our Broncos. This valley goes crazy when September arrives.

I decided it was time to get our house in the festive spirit as well. Why not? So I decided to tackle the mantle yet again.

By the way...the spelling of mantle is one of those things that drives me crazy. Apparently you can spell it either mant-LE or mant-EL. Both mantle and mantel are interchangeable. I hate indecisiveness in language. Especially since I seem to run into mantel all over Pinterest, while I seem to prefer mantle. * End rant. *

The initial endeavor for this project failed miserably. I planned to make some cardboard letters, but it was the project disaster that ended up finding a home in the trashcan.

I redesigned and moved on. Because I'm a ... professional? Who knows? Something like that, I guess.


The first part was easy. A photo made for us last Christmas by my brother Tyler and his wife Victoria. It was taken at a game last season. Next to that, a blue beer bottle from some home brew my brother Chad made. This mantle is a family affair.


On the left side, a few more bottles. This time, a twine wound bottle from our wedding tied with an orange ribbon and an empty wine bottle filled with water and blue food coloring that I sealed with a saved cork. 

I dug out a photo frame that hadn't seen the light of day since approximately 2006. It was hunter green and needed a little neutralizing. A quick black paint job and it was ready to go. In it, a copy of the Boise State fight song all decked out in blue and orange.

After that, the big guns. I needed a centerpiece.


I busted out one of the $2 shelves I salvaged over at ReStore (one of my favorite places in the world) and gave it a quick prime/spray paint.

Thanks to my lack of transfer paper (a small oversight), I had to change my initial plans. I printed out my logos and laid them down over the shelf. I traced over them with an X-Acto knife, leaving small indentations that I could follow for painting.

I hand painted the sign while listening to last week's game (which we won, by the way). Once again, I was reminded that tempera paint is not always my friend. It turned out a little less smooth than I originally planned. But, I think it still looks pretty sharp. I sealed it with some clear coat and it was ready to go. Darian thought it was a sticker, so I'm calling it a win.

Speaking of Darian, he made it obvious that I decorate the mantle far too often. I was down measuring the length when he piped in, "Oh...you're making one of those again?" He was referring to the banner.

The banner was pretty straight forward. Some cardstock triangles, a string of blue ribbon, a little bit of glue, and some strips of leftover fabric. Voila. 


Just like that, festive banner. Go Broncos!!

Tuesday, April 22, 2014

"S" is for Scrap Fabric Stockings


Today's letter of the day is "S". And in my world, "S" typically stands for scrap in some form or another. Most of the time, that's scrapbooking. But not today. Today, it's fabric scraps and some cute little scrap fabric stockings.

You've heard of Christmas in July, right? Well...today it's Christmas in April. Just go with it.

Saturday, April 5, 2014

"E" is for Easter


Wow! Day 5. Trucking right along. Today's letter?


And this time of year, E is for Easter!

Continuing my goal this year of making decor for every holiday and not just Halloween, I decided to take advantage of "E" day and make something Easter themed. Two birds and all that.

Sunday, March 23, 2014

Summary Sunday: Spring Break Edition

It's Spring Break over here. Well...technically for me, it's Spring Break weekend, minorly interrupted by working Monday, and then it's Spring Break. I'll be spending my time off getting pictures and posts prepped for April's A-to-Z Challenge.

I actually did a little work on it yesterday when I discovered that I once again failed and forgot to take pictures of the majority of projects that I made for Christmas presents last year. Crap. Seriously. When will I learn?!? So...I'll now be working on recreating some of those items to have enough pictures for posts. Sometimes I can really be a dunce.

I'm really wrapped up in playing games on my iPad right now, so let's make this quick. I have farming that needs to be done, settlers who need settled, and a logic puzzle that won't solve itself. Yup...also a nerd.

Let's take a short walk down recent memory lane and see what I accomplished this week.

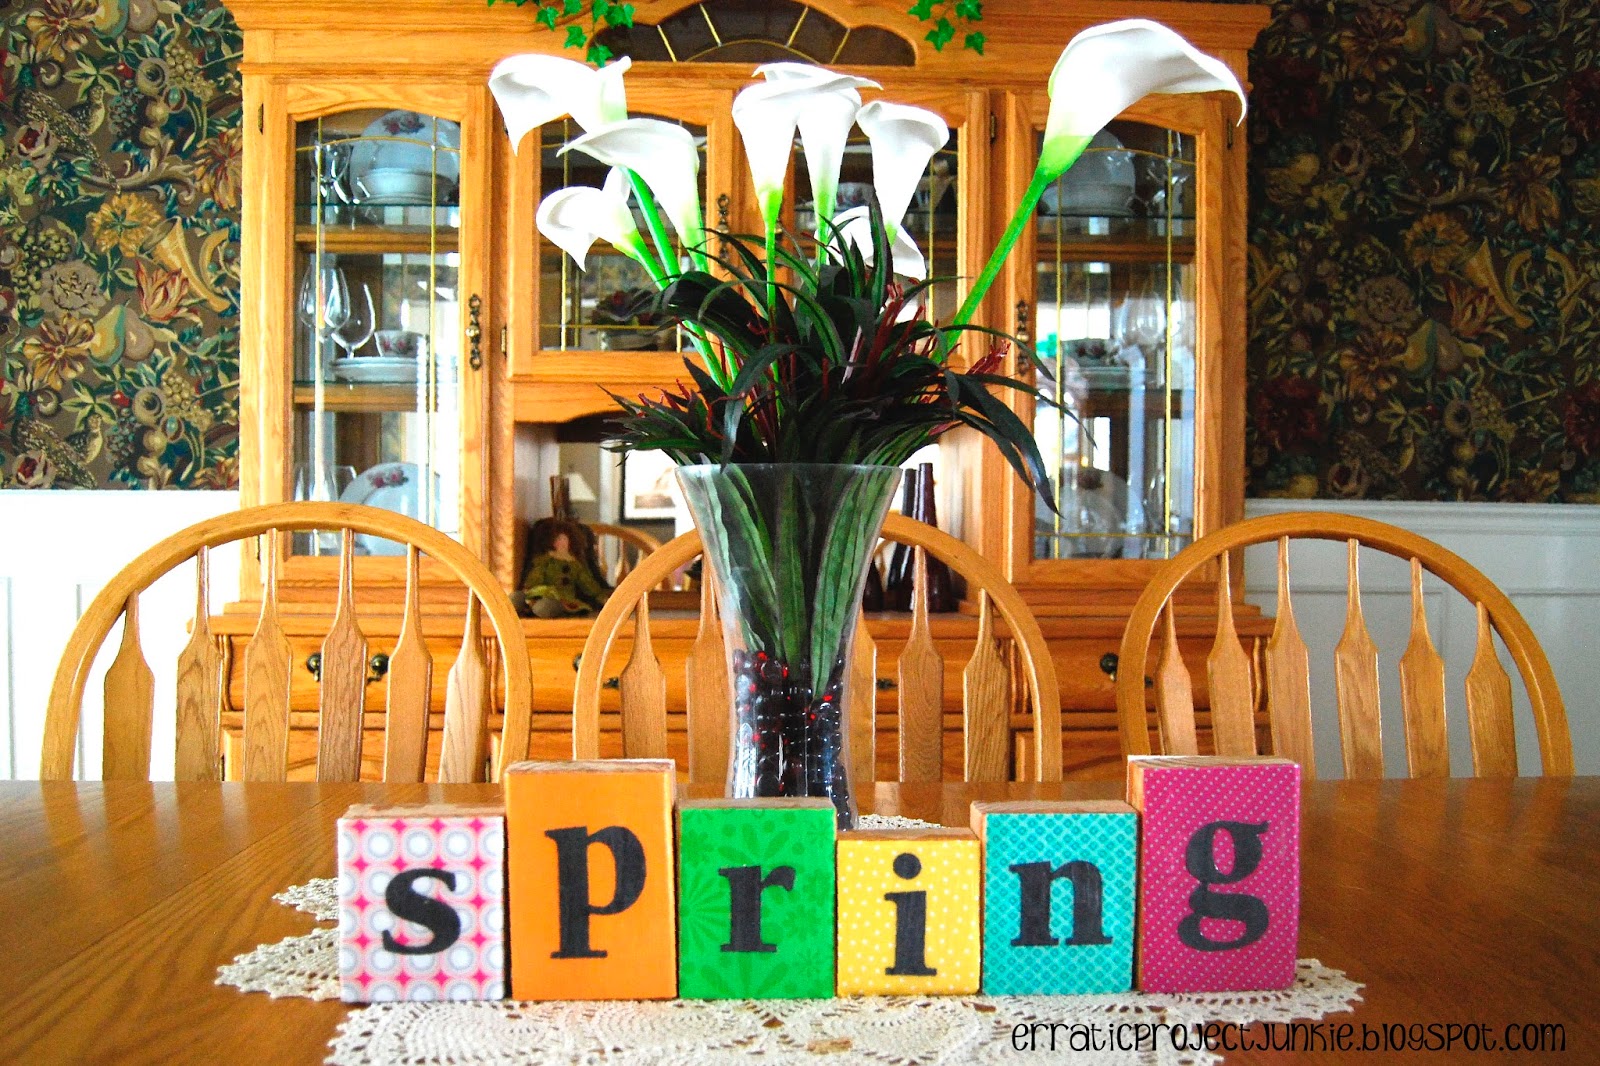
Posts I Posted: It was actually a fairly productive week of posting. I shared my long overdue "Love" blocks that double as my "Lucky" blocks.


I loved them so much that I made a second reversible set for spring and Easter.


I shared my new family cleaning plan (which is working fairly well, but still needs some tweaking and some getting used to). My mother also enjoyed the fact that Darian did a crap job on the vacuuming earlier this week. She thinks it's karma for the crap I pulled vacuuming (or rather, not vacuuming) as a kid.

And I revealed my plan for the A-to-Z Challenge (which is scaring the pants off of me).

Recipes I Tried: It was a good week in the food department as well. I experimented a few times and came up with some good recipes that will be making a debut on the blog later this year. This week I made Buffalo Chicken Macaroni & Cheese, Stuffed Cheese Ranch Burgers, and some Bacon Ranch Garlic Potatoes. We enjoyed all three of them. Yup...didn't destroy anything. Amazing. The boys liked all three recipes and have already requested that they all get made again. Double amazing.

Books I Read: Things were a little slower in the reading zone. I am currently one book behind my Goodreads goal (at 13 out of 64) and reading Eleanor & Park by Rainbow Rowell. I finished up What Alice Forgot by Liane Moriarty last Sunday night. It was really good and will make it into the bracket for 2014 BOTY. Though I'm not finished with Eleanor & Park yet, I think it will probably make it into the running as well. Oh...and in case you're wondering...yes, there will still be full reviews on the four and five star rated books this year (and maybe some select three stars). May will be one of two months dedicated to reading, so most of them will start debuting then. (That's also when you'll probably start hearing from Darian again. He's been a little quiet on the reading front this year.)

Projects I Worked On/Finished: Well...I finished the blocks and the cleaning plan mentioned above. I've also been doing some serious photo organization and editing for the upcoming April posts. Other than that, not much has happened. This week will get a little crazy though. I have at least two projects that will need to get made during the week to allow for photos for posts within the first week of the A-to-Z Challenge. I also have my awesome nephew turning one in just a couple of weeks, so his birthday present will be in the works. My brother will be turning 31 this week, but he's not getting a project. (Though I did contemplate making him a shirt using last week's Pinterest Pin of the Week.) Sorry, Tyler. You're out of luck until Christmas. (Don't worry...he still gets a gift, just not a homemade project.)

Favorite Pinterest Pin: Hmm...it's a tough one this week. Most of my pins were actually items pinned to my Bucket List this week (in preparation for a project in the fall). But...there were a few things that I found outside of that mess. I actually ended up with two that I can't choose between, so I'm going to go ahead and declare a tie and share both of them.

The first one is a photo only, so there will be some deconstructing and redesigning when I decide to make it myself. It's these cute little felt owls (that I will probably be turning into larger sized pillows).


My second favorite pin was this license plate map done by Angela over at blue i style. She makes some cute stuff. You need to go check her out!


And...that's a wrap! Now I can get back to those very important iPad apps.

Have a great Spring Break! I'll be checking in during the week amidst the crafting and photo editing. (I've made a promise to myself that I will get out of bed every day by 9:30. We'll see how that goes.)


Friday, March 21, 2014

Easter & Spring Reversible Blocks


Happy 1st day of spring!! Yay! It's finally here.

I actually really love winter, it's second only to fall (autumn if you want to be fancy) for me in terms of favorite seasons. But...I think I lost my love for the winter of 2013-2014 when our heater died. Yup...time for spring. Enough cold weather...let's warm up a little.

So...in the spirit of spring, how about something a little bright and cheery? How about another set of reversible decorative blocks? I'm on a roll.

Let's refresh the steps to this straightforward kind of project.

Start with some precut and sanded sections of 2x4 (you'll remember that I use sizes from 3" to 6").


Measure your blocks and assign each one a letter. When you're working with reversibles, you'll have to assign letters twice...once for each side.

Pick out your papers. I chose bright and happy colors (jewel tones) for spring and slightly more muted colors for Easter.


Use your measurements to cut out matching sheets of paper. Then select your letters (or cut them out with your stencil or die cut machine).


Don't the colors look happy?


Adhere the letters to the papers using your preferred method (I use my sticker maker) and use ModPodge to adhere the papers to their corresponding blocks. With reversible blocks, you'll want to have one side fully dried before you do the other...otherwise you run the risk of gluing one side of your project to your working surface. Don't do that...you don't need the aggravation. Just be patient and give it a couple of hours.


Coat the papers with 2-3 top coats of ModPodge, allowing for full drying time between the coats. Make sure to smooth out any wrinkles that develop. (Plan on having serious sticky fingers before you're done).


And now you have a two-in-one set of decorative blocks that can be easily reversed and tidily stored!

Happy Spring!

Monday, March 17, 2014

Love Blocks


Ya, ya...I know it's March and that love was the theme for February. But...this is one of the posts that didn't make it in time. And...it goes with the post that went up on the blog last week, so it's just going to happen today. Embrace the chaos!

These Love Blocks are the back sides of the Lucky Blocks. Yup...they're reversible! Oooh...fancy. Actually, it's just a nice way to reduce the amount of blocks that Collin had to cut and the number of blocks I have to store in between holidays. Believe it or not, storage space is not unlimited in our house.


Like I showed you in the post for the Lucky Blocks, these are pretty easy to make and they don't take a lot of supplies.

To make the Love Blocks you'll need:

* 4-5 sanded wood blocks cut from a 2x4. You'll need five if you want the heart and if you want them to be reversible with the Lucky Blocks.


* Patterned paper.


* Letters.

*Adhesive for your letters.

* ModPodge and a paint brush. I used a foam brush on these and I may have lost my love for them. Not one, but two of them decided to disintegrate and find their way to the trash can during the project, leaving little black foam specs all stuck up in the ModPodge. Bologna foam brushes, bologna. (Boloney? Ya...I don't know if you're supposed to use the proper spelling when you're using it as an insult or not, but I'm pretty fed up with foam brushes.)


Anywho...let's put these puppies together.

The directions are obviously the same as with the lucky blocks. Measure the height and width of each of the blocks. Cut out your paper to the measured dimensions. When in doubt, cut just a titch smaller. It's easier to adhere paper that's a little smaller than the wood block than it is to mold the paper over the edges...especially if your paper is a little on the thick side.


Adhere letters to their corresponding papers. I like to use my sticker maker for this. The sticker maker likes to run out of adhesive before I'm finished using it.


Attach the paper to the wood block using the Mod Podge by applying the ModPodge to the paper and then attaching to the blocks. This will minimize your wrinkles. I found an even easier method this time and actually adhered my paper to the blocks by running them through the sticker maker. That was a horrible idea. The lack of ModPodge under the paper made it more difficult to avoid wrinkles and seal the edges. Any trapped air bubbles with this method will be twice as ugly than with the ModPodge method. You will curse. Don't try to avoid the ModPodge. You will be sorry.


Let the blocks dry. Make sure you wait enough time in between Mod Podge applications in order to prevent excess bubbles or wrinkles in the paper.


Coat the tops of the papers with a thin layer of ModPodge. Make sure you get fully over all edges. Repeat this process two to three times until you get the finish you're looking for.


And you're finished. Tada! In the end, I've decided that I like the matte finish better for these projects. The gloss finish tends to accentuate the wrinkles in the paper. I prefer to hide my boo boos.


Sunday, March 16, 2014

Summary Sunday: Sticky Fingers Edition

Hi there! I'm taking a break from being covered in ModPodge to get this post written before Sunday becomes Monday and I'm a day late again.

I've been working on a pile of projects over the last couple of days. I've been productive, but not as much as I've wanted to be thanks to a few snafu's. I managed to have some serious issues with the ModPodge yesterday and had a couple of foam brushes disintegrate mid-glue. I'm starting to lose my love for foam brushes. To which Collin said "Aren't those meant to be for temporary use?" Ugh. Doesn't he know that logic doesn't apply when crafting?

So now that I'm actually getting some things done, let's see what else I did this week.

Posts I Posted: I finished and posted not one, but TWO St. Patrick's Day projects. Amazing. Both projects are pretty easy and inexpensive to make...just the way I like them.


The banner took Collin two days to notice. I had to point it out for him. At that point he said, "Oh. I thought it had been there for quite a while, so I didn't say anything." My husband, Captain Observant, everyone.


The blocks were the start of the ModPodge mania. I'm still not super thrilled with the fact that the wrinkles showed up the way they did on the "y", but that's the nature of this kind of project. I suppose I could have done some creative photo editing to make it look like they didn't exist, but I both don't have the patience for that kind of thing and don't feel it's fair to misrepresent the imperfection of my own projects. After all, when I make a project based on someone else's post, I like to know that they occasionally struggle with getting things to look just so. So there you go...I struggle too. (More often that I would like to.)

Recipes I Tried: We had some thawed out ground beef that desperately needed to get used and I really didn't feel like doing anything extravagant on Monday, so we tried out the Stove Top Meatloaf. It will not win any beauty awards (hence the lack of a picture for you today), but it was delicious. Both of the boys wolfed it down. It also had the added bonus of being super simple. It took me about 5 minutes to prep and then I was able to work on my St. Patrick's Banner while it cooked.

Books I Read: As long as I finish What Alice Forgot by Liane Moriarty tonight (which I expect to happen), I will remain on track for my book reading goals. Amazing. I finished Amy & Roger's Epic Detour by Morgan Matson. I loved it! You need to read it. It was just so good. I'm so happy and relieved to finally be on a streak of good books.

Projects I Worked On/Finished: Other that the St. Pat's crafts, I've been busy working on a few other things. I have two projects that will be up on the blog next week and I'm working on putting together a new cleaning schedule for the family that will be my first actual post for this month's theme of spring cleaning & organization. Sad, but true. At least I'm finally getting to it. Once I get that ready to roll, then there will be some other smaller theme related projects that should be able to get tackled. I'm also prepping some projects and photos for the big A-to-Z Challenge coming up in April. It's a monster undertaking, so I'm hoping to be sufficiently prepared come April 1st.

Favorite Pin of the Week: This week's favorite pin had me laughing out loud. It is actually a picture from a t-shirt for sale over at RoadKill T-Shirts that I found via Sugar Bee Crafts. I love it because it actually reminds me of my brother. He has a thing for T-Rex that's too long of a story to explain here and he makes hilarious cards for my family for birthdays...this seems like something he would do.


See. Hilarious. Poor image quality...but hilarious.

And now I'm off to get back to the ModPodge. Don't forget to wear your green tomorrow! Happy St. Patrick's Day!


Saturday, March 15, 2014

"Lucky" Wood Blocks

Hey, hey! It's project time. Whee!! And just in time for St. Patrick's Day, how about another piece of holiday decor? Are you keeping track here? Because this makes two pieces of decor for St. Patrick's Day. Whoa. I'm totally getting out of control.


You might remember that I made a set of Trick or Treat wood blocks for Halloween. I like them quite a bit, so they're now becoming a series thing. You know...like I'll have sets for all of the major holidays. Why not? They're easy to make and I have wood floating around. Sounds like a plan.

So, to make these yourself, you won't need a whole lot of stuff. In fact, all you'll need is:

* 5 wood blocks cut from a 2x4. All of the wood blocks I use for these holiday blocks are cut at lengths between 3 and 5 inches. I like to mix and match them. I sanded the edges of my blocks to keep my super accident prone self from getting any splinters. Unlike my Halloween blocks, I didn't paint these ones before getting going. I didn't feel like these ones really needed it.


* Patterned paper. The thinner paper works the best. Cardstock works, but the coated cardstock is a bit of a pain. It doesn't deal well with the ModPodge, since ideally you want the paper to soak up the ModPodge to some extent. You can use just one pattern of paper for all of the blocks, or you can mix it up and use a different pattern for each block like I did.

* Letters. I cut all of my letters out from sparkled black cardstock using my Pazzle. You could also use stamps, stickers or chipboard. Whatever floats your boat.


*Adhesive for your letters. Again, you can go a lot of different ways here. I like to use my Xyron Sticker Maker, but even a glue stick will work just fine.

* ModPodge and a paint brush. For these blocks, I used Gloss ModPodge. I use foam brushes, but any brush will work.

Alright, are you ready to assemble?


Measure the height and width of each of your selected wood blocks. I marked each block with its measurements and the letter that it would end up being so that I didn't get the block turned upside down or accidentally switch two similar blocks when it came time to adhere the paper.

Cut out your paper to the dimensions of each block. When in doubt, cut just a titch smaller. It's easier to adhere paper that's a little smaller than the wood block than it is to mold the paper over the edges...especially if your paper is a little on the thick side.


Adhere letters to their corresponding papers.


Attach the paper to the wood block using the ModPodge. Now...it typically works out better to put the ModPodge on the paper and then attach versus putting the ModPodge on the block. Both options will work, but putting the adhesive on the paper will result in less of a wrinkled appearance when you're done.


Let the blocks dry. Make sure you wait enough time in between ModPodge applications in order to prevent excess bubbles or wrinkles in the paper.


Coat the papers with a thin layer of ModPodge. Make sure you get fully over all edges. Repeat this process two to three times until you get the finish you're looking for.


And that's it! You can finish them off with clear coat, but it's not necessary if they're going to stay indoors and dry.

Other Posts You Might LIke

Related Posts Plugin for WordPress, Blogger...
01 09 10 11 12
Blogging tips