
So my niece, the adorable Miss M, turns 1 tomorrow. How quickly the year has flown by! Considering myself crafty, I decided to make her birthday presents for her this year. It all started with finding this on Pinterest.
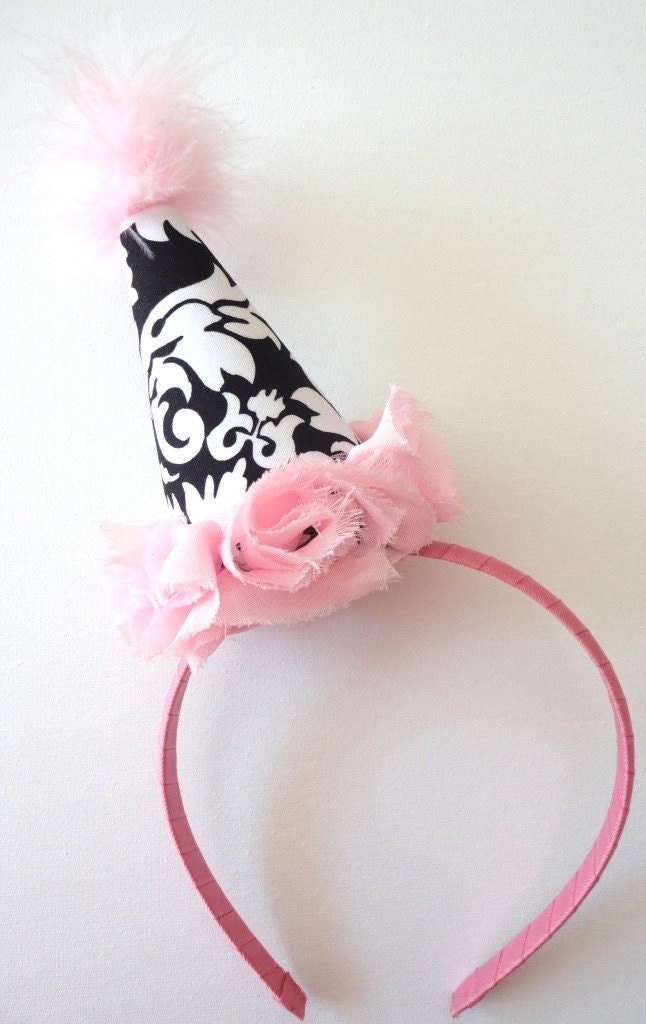
It's cute right!? I thought so. Unfortunately, I quickly discovered that it was on Etsy. Darn you Etsy!! (I shake my fist.) I need tutorials on this kind of cute stuff. You tease me with the possibility of creating something cute and then I only come to find that I have to figure it out on my own. Bah!
Now, with half of this Etsy stuff I just move it to the bottom of my "projects I want to do" list and move on. But for Miss M I had to have this. So I set out to make my own version. Mine didn't end up looking exactly like this one, but I like it none the less.

If you want to make one like mine, here's what you'll need :
1/2 quarter flat fabric (the pattern you want the cone to be).
1/4 quarter flat fabric (the pattern you want the top and rim to be).
1 headband.
Appropriate thread.
Batting (I used loose batting so I'm not sure exactly how much I used up, but it wasn't that much).
First, I cut out a pattern to make a cone. You'll need the fan shaped cone section as well as a circular portion for the bottom of the cone. Make your circular pattern about 1/2" wider in diameter that the base of your cone will be. This will allow enough room for seams.

Cut out the two separate pieces in your primary fabric. I used a lightweight black and white polka dot. Pin the edges of the circular section to bottom of the cone section and sew circumferentially with the seams on the inside, leaving a 1 inch section open for stuffing. Then sew the edges of the cone section together, with the seam facing inward. Make sure you don't sew the entire cone edge to the circle. Turn the whole thing inside out. You should have a rough cone shape with a small opening hatch at the bottom.
Stuff your batting in through the open slot. I packed mine pretty tight and then smooshed it around to make sure things were pretty even. At first I had some kind of lumpy sections. It took a little manuvering. Once you have that finished, sew an invisible stitch to close the base. If you don't know how to do that, you can find a short tutorial here. (Thanks Maggie! I stole it from your Pinterest board.)

You're now going to work on the bottom ruffle and top poof for the hat. Take your second fabric and cut out two 1 1/4" x 24" strips. (Depending on your circumference you may not end up using the entire length - that's okay.) Sew the strips with 1/8" side seams to get nice even edges.

Use a gathering stitch to bunch up each strip. I used my sewing machine to do this. It was the first time I'd ever actually done a gathering stitch on my machine so I used a tutorial. (I love the internet).
It was super easy. I will never do it by hand again. It's my new favorite trick. I did a double gather on each strip and then pulled them fairly tightly.
Use one strip as your bottom ruffle. Pin the ruffle around the base of the cone. You could probably be creative and figure out how to do this on your machine, but I did sew this one on by hand. Oh, and FYI...fail on my part. I used white thread. So now you can see all of my stitches. Dumb.
Take the second strip and start folding it in and wrapping it around itself until you end up with a ball shape. Pin this to the top of the cone and manipulate as desired. I wanted mine to look a little sloppy. If you want a super neat little circle then you could just sew a small pouch and fill it with batting rather than using a gathered strip.

Now sew your cone onto your headband. I sewed this by hand. I wanted mine to lean slightly off to the side, but you could just as easily sew it to the center. I lined the headband up to the center of the cone's width and used one pin to hold it in place. I then stitched the hat directly to the headband with just your basic stitch. I did this pretty tightly and folded the cone to the headband as I went so that there is no slop. And then you're done.
The nice thing about this is that it should fit Miss M for quite a few years so she can wear it at later birthday parties or even just as part of her dress up clothes. Attach a little silk sash to the top and you have a perfect princess hat.
So take that Etsy! I don't need your darned tutorial anyway.
These headbands look so wonderful.
ReplyDeleteThanks Tim!
Delete