
It's day 3 of A to Z...that means that letter C is up. If you're on Pinterest, you've probably seen at least one of these pop up in your feed. DIY Child Growth Rulers are becoming a pretty popular trend. I've noticed though that a lot of them don't link up to any sort of tutorial...it's all just photos. Today, I fix that.
These were made for Christmas presents, so I kind of worked in assembly line fashion. I started out with 4 pine boards from Home Depot. Each board was 6 feet long and 8" wide. The 6" wide ones are cheaper and will still get the job done, but I wanted a board that looked good and sturdy.

I stained each board (on both sides) with 2-3 coats of MinWax Wood Finish in Provincial 211. This gave a semi-dark stain, but still allowed the grain of the boards to come through well.

A lot of time was spent staining and drying, flipping, staining and drying. Just getting this phase done took several days. Be patient... Oh...and don't expect perfection. The stain will have some "character".

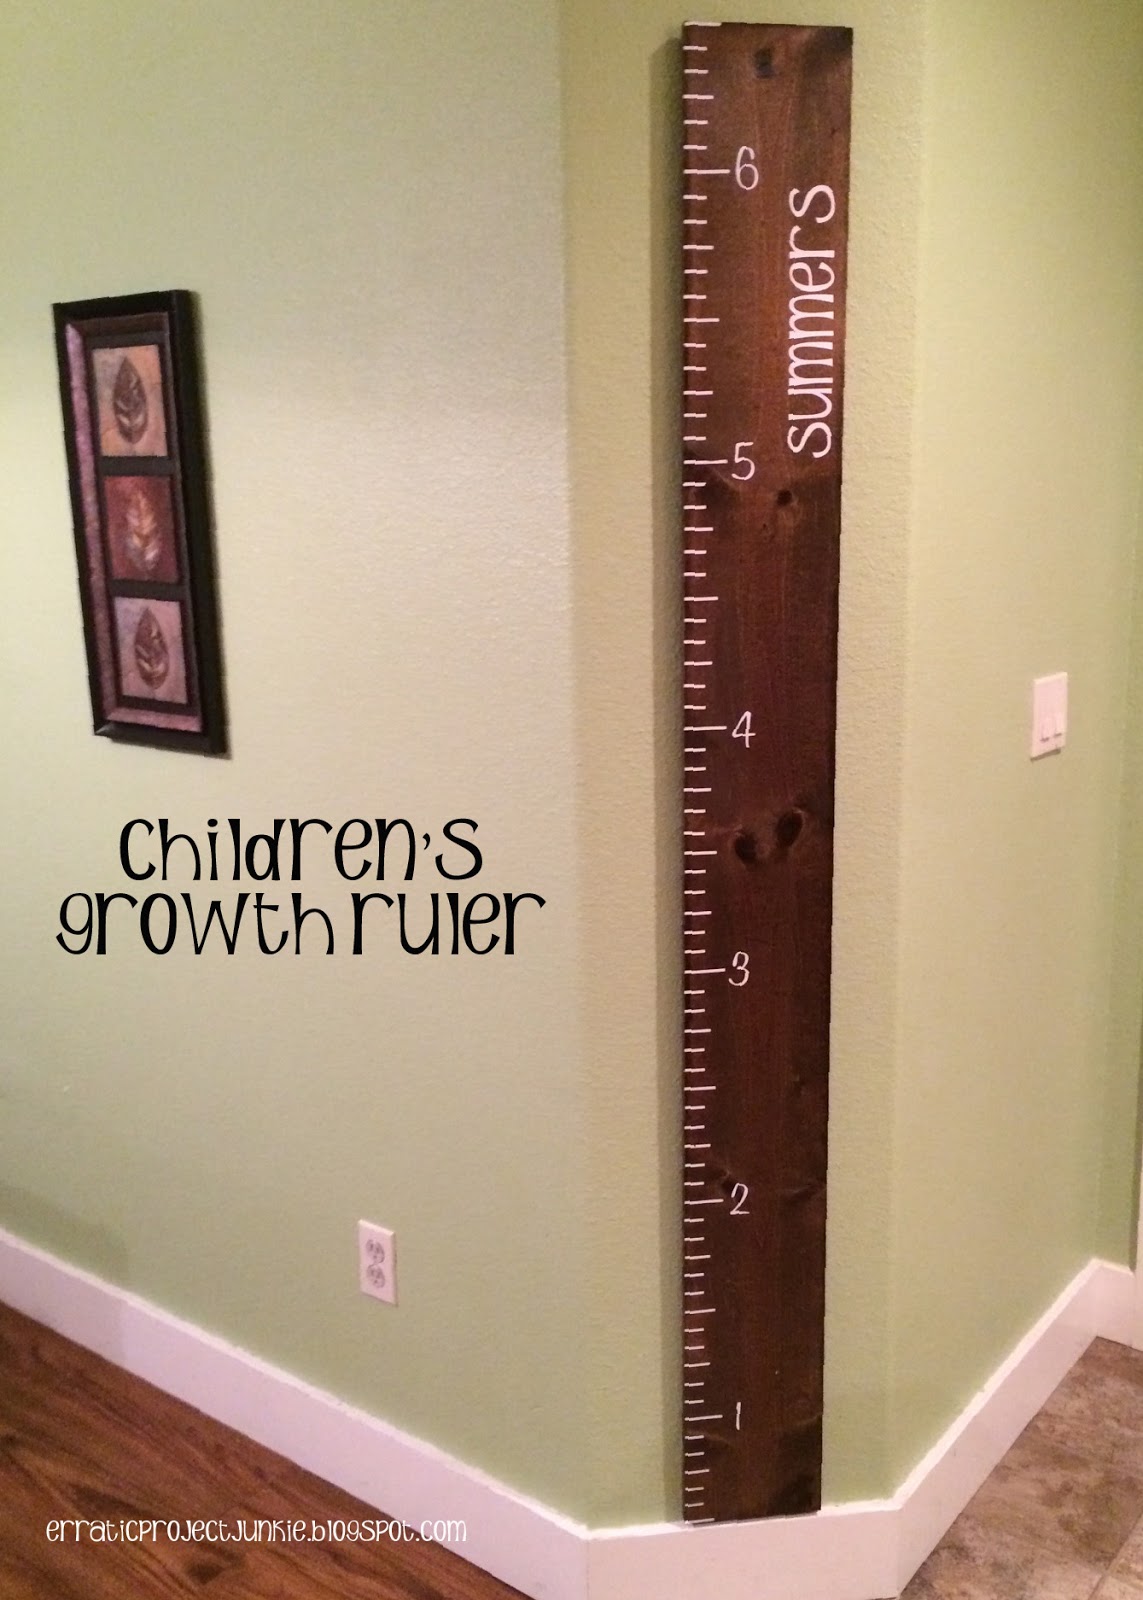
Once the stained boards were ready to roll, I adhered vinyl lettering (last names) and numbers along with ruler hash marks. I cut all of my vinyl pieces out using my Pazzle (similar to a Cricut or Silhouette). I used indoor vinyl, but would use outdoor vinyl if I was to do this project again. The indoor tends to get a little finicky and I did have a little peel up on a few of the hash marks.
Marks were started at 6" and went all the way up to 6 1/2 feet. Starting at 6" was not an accident...you'll see why shortly.

Once all of the vinyl was adhered, I let the vinyl "cure" over night. I then coated each board with clearcoat. You could also use ModPodge, but I wasn't wanting to brush ModPodge on for days. Instead, I settled for 3 coats of clearcoat over a day and a half.

The 6" at the bottom was designed to allow room for moulding. The one above was for my sister-in-law's family. As you can see, it was just the right height for their 6" base boards.
Heights for multiple children can be added. A white or silver sharpie works well to show up on the board surface.
A mildly time-consuming project, but technically simple and a perfect decorating piece for those with young kids.
I hope your A to Z is going swimmingly! One more this week: D is up tomorrow!
Did you miss any of my previous A to Z posts?
1. A is for Anna (Easy Anna Cape)
2. B is for Bath (Appliqued Bath Mat)
That is such an awesome idea - I never would have thought of something like that. Much posher than the plastic height charts you often see on walls. I remember we had a paper one at primary school and everyone was marked off every now and then :).
ReplyDeleteTasha
Tasha's Thinkings | Wittegen Press | FB3X (AC)
Oh, Elle—you continue to impress me! These boards look gorgeous. You must be the favored gift-giver in your family. :)
ReplyDeleteThese are so cute...and so far my favorite.
ReplyDeletevery cute idea! I'm popping in from the a-z, looking mainly for crafters! I love crafts too - do them mainly at Xmas time, though. Come visit me, if you'd like:
ReplyDeletehttp://adventuresintheballpark.blogspot.com
That is an awesome idea! Looks so much better than most other ones I have seen. The effort you put into is definitely worth it based on the photos of the finished product. You could always sell the tutorial/pattern on your Etsy store too.
ReplyDeleteSean at His and Her Hobbies
Thanks Tasha! I like the modern feel to them, especially with the darker woods. Something just makes it feel homey but still sophisticated. Glad I pulled it off. :)
ReplyDeleteThanks Shaina! I certainly hope the kids like the gifts we send. Occasionally there is a project flop, but most of the time I learn from my mistakes.
ReplyDeleteThanks Deb! You'll need to make sure to be here for P, S & V. Those are my three favorites.
ReplyDeleteThanks Allyse! Appreciate you visiting!
ReplyDeleteGlad you came over Mare. We definitely need more crafters participating. I think it's so much fun to see what everyone else has come up with. I'll have to go see what you have up your sleeve for A to Z.
ReplyDeleteThanks Sean! I really need to get my act together with the Etsy shop. Best laid plans and all that... :) One of these days I'll have a stash big enough to get some actual product ready to roll.
ReplyDeleteThey turned out great!! I love that you have the names on them. Thanks for linking up to The Creative Circle.
ReplyDeleteThat's an awesome idea and I love how it looks. It's like a decoration. :)
ReplyDelete-Chrys Fey
Tremp’s Troops - A to Z Co-co-host
Write with Fey
Thanks Chrys! I think an upgrade to the outdoor vinyl will make them look even sharper. Not too expensive to make either...always a plus!
Delete