

Wow...only a week left in the A to Z Challenge. This month has FLOWN by. I've had a fantastic time writing these posts and reading the works from other bloggers. I've found a few new project ideas along the way and been given some great ideas for project alterations or improvements by those of you who have left comments. Thank you!
For those of you who have been wondering, yes...I will be selling some of the projects you've been seeing pop up here on the blog. Once this month is finished, I'll be spending a lot more time up in the crop room making friends with my sewing machine and bonding (quite possibly literally) with the ModPodge. There will be a grand opening of my Etsy shop before summer begins. I'll keep you posted.
And now for a nice and easy project for letter T. T is for Toddler Tutu. Best of all? This project is almost 100% no sew. Nice, right? All you'll need for this project is some fabric, some elastic, and some tulle.

You can make these in virtually any size. In my case, the girls were between 2 and 4 years old and I made them at thigh length. You can make them for anyone from toddler to adult as long as you know waist size, and from thigh length to ankle length as long as you know your measurements and you purchase enough tulle.
For my toddler ones, I used up about 1 1/2 yards of tulle per tutu. This made them super puffy at the waist. I made them in three different colors: hot pink, purple, and periwinkle, so I got three different colors of elastic. You really could just use white for anything if you want to. I just liked the different colors.
You can also ditch the elastic idea all together and use ribbon. The upside to this is that you can make the project 100% no sew. The downside is that they will have to be untied and retied to take them off and put them on while still having them sized appropriately.
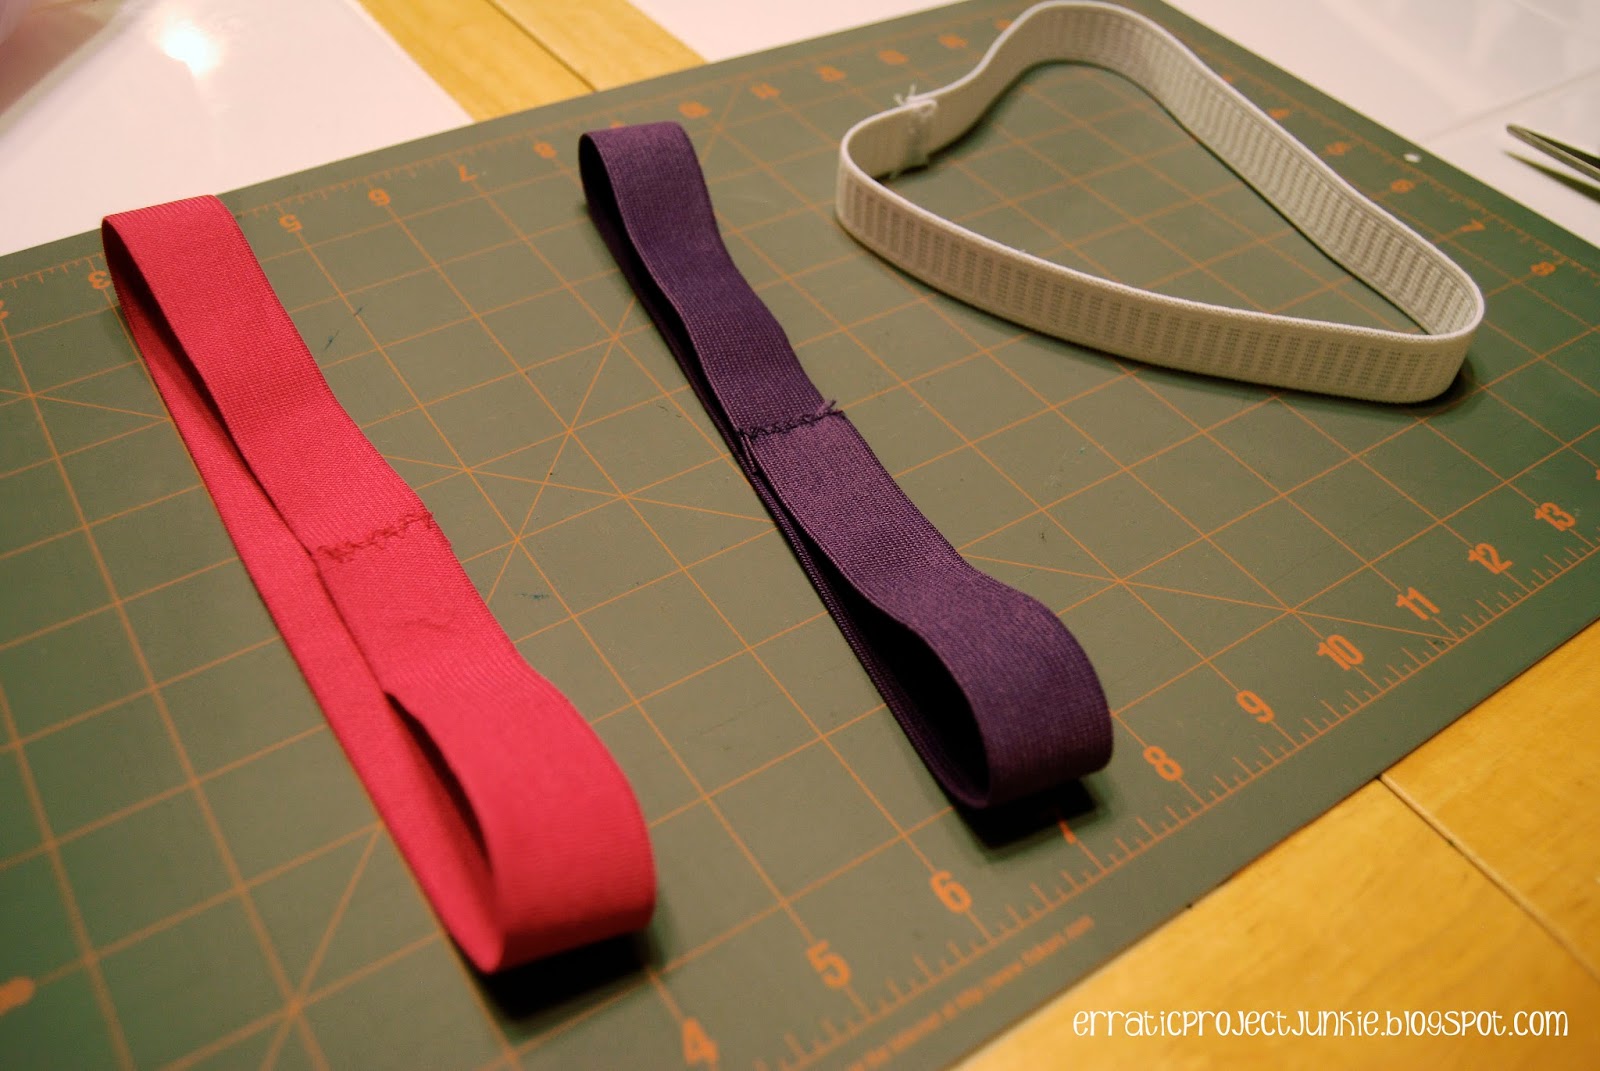
Start out by measuring your model's waist. You'll want to cut your elastic to that length and then stitch the two ends together. That's all the sewing you're going to do. Tada! Just make sure to get a good solid stitch here so that your waistband doesn't come undone.
If you're using ribbon, measure out at least a foot longer than you want the waist to be. This will give you sufficient room to tie the ribbon into a bow at the waist.

Next, you'll cut your strips of tulle. For my length, I cut 3' wide strips. You can really use whatever you want here, but the thinner the strips the more poof you can get.
My bolts were 54" in length, so I cut that in half, yielding two 27" strips per 3" cut. Your finished length will be just under 1/2 of the total length of your strips (mine were about 12" beyond the waistband). Figure out the length you want before you start cutting, this way you'll know whether to cut across or down your bolt of fabric.

Now it gets very simple. Form your strip into a loop. Place the tails in the center of your waistband. Your loop should be on the outside. Pull the tails around the waistband and through the loop and then tighten the pseudo slipknot up to the bottom edge of the waistband. That's it. Just repeat these strips all the way around your band.
If you're using ribbon, form your loops and slip the tails partially through before feeding them onto the length of ribbon and tightening. Same basic process, just a slightly different approach.
Once you have everything wrapped, poof up the tulle and you're set to go. Your little ballerinas will love you.

Or they'll decide that one tutu is not enough and wear multiples together. Because you can never be enough of a princess ballerina.
Thanks to all of you stopping by from A-to-Z Challenge! I love new readers. Make sure to leave me a comment below (including your blog address) so that I can return the favor by visiting you.
Love your project, Elle. And she is too cute. I know my daughters will love the scrap stocking. Another pin. Thanks for the great ideas. And thanks for stopping by to say hi during the A to Z challenge. Maria from Delight Directed Living
ReplyDeleteGlad you found some things to inspire you! Miss Abigail is quite the photo ham. The photo was taken when she was trying to retrieve the cat from under the Christmas tree after he ran away from her. Thanks for visiting!
DeleteThat is a cute one to make ! We don;t use them much in India but for a change it wud be lovely to make one rather than buying
ReplyDeleteDropping by from A to z
http://afshan-shaik.blogspot.in/
GOOD LUCK
Thanks for visiting! You can't get much easier than this project. And they're just so good for little girls who like to play dress up.
DeleteThis is so cute! This is a great idea to gift the little dolls of my friends! :) Girls rock!!!!!
ReplyDeleteI'm totally a spoiler of the little girls. They wind up with far too many presents every year. All because there are just too many cute project items for girls! I blame Pinterest. :)
DeleteFun project for the little bitty in your life. All my girls have gotten to big for a tutu, but in their day, they would have never taken it off.
ReplyDeleteAnd that's exactly what happens! Thank goodness the one pictured in this post has more than one. She is always dressed up as one princess or another.
DeleteSo cute. As a mom of one seriously handsome little boy, I don't have a reason to make these, and I'm thinking that's a good thing. I'd spend way too much time and money making the cute things I'm always seeing.
ReplyDeleteI do tend to favor the girls slightly, but that's only because there were three of them before there were any little boys (mine is too old for the cutesy stuff). But now there's a boy in the mix! So there are bound to be more boy projects popping up here in the future. I just can't help but spoil them!
Delete