Thursday, June 20, 2013

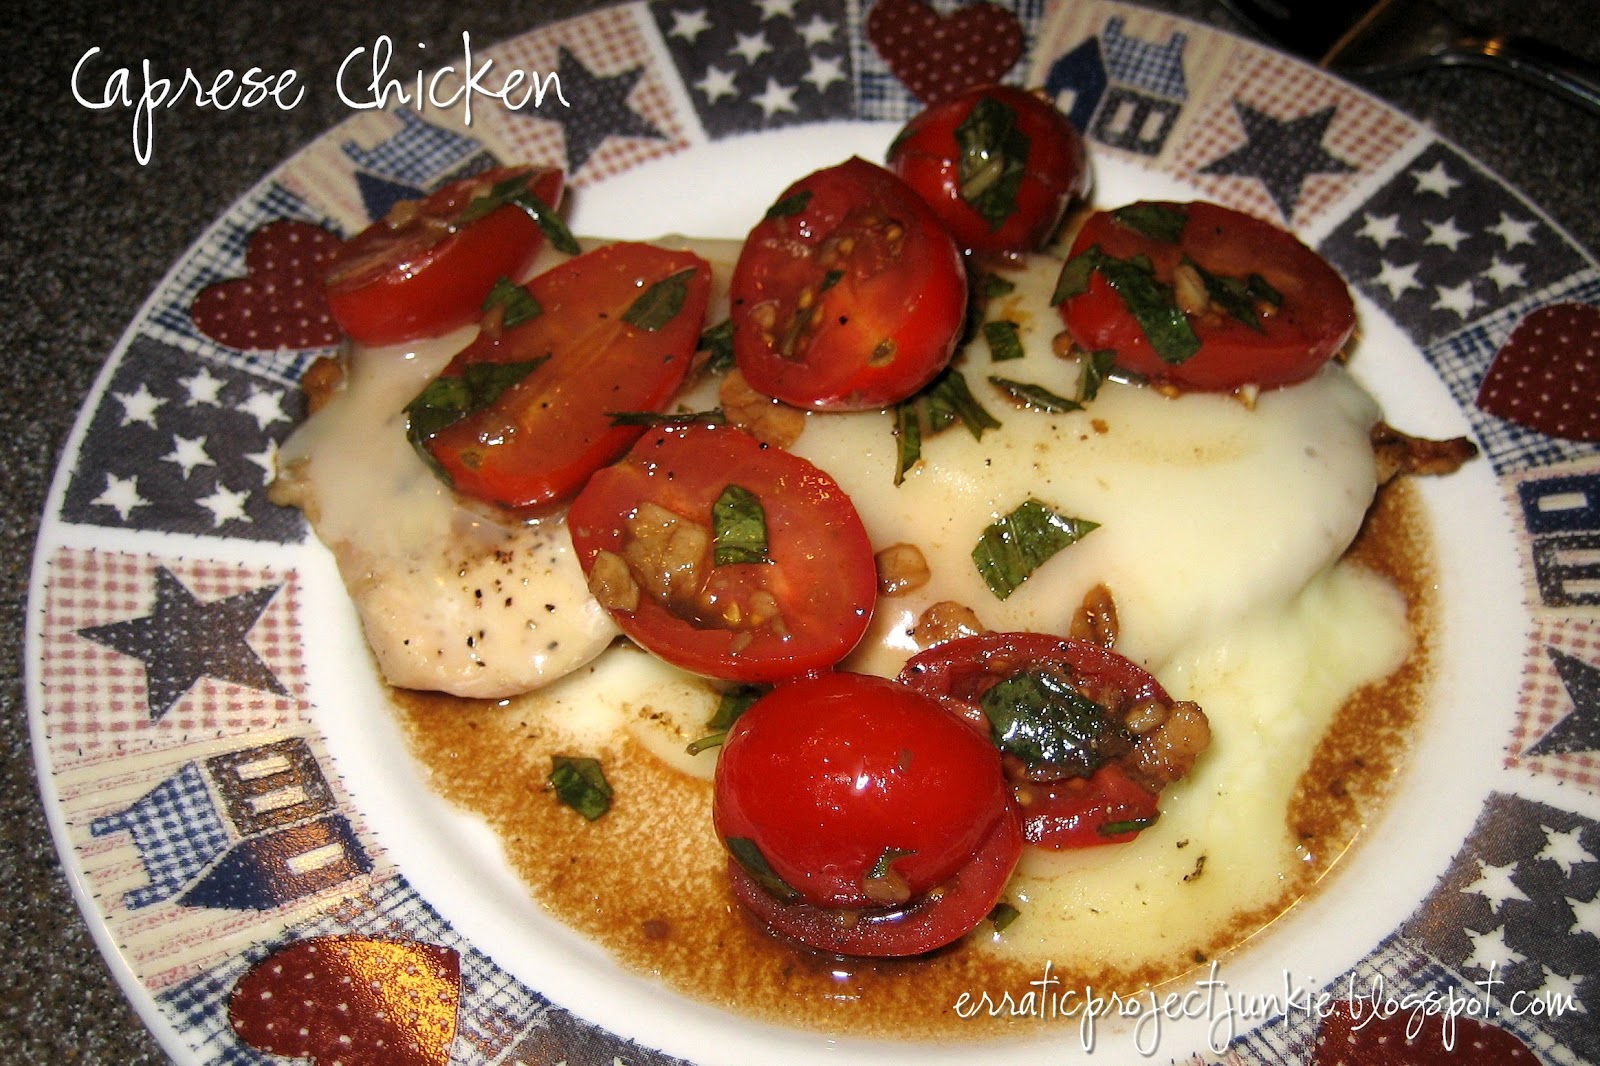
Caprese Chicken


It's supposedly summertime (though it's a bit chilly here today), so I figured it was time to break out a recipe that has been sitting in the drafts for a while. It's a good summertime, dinner on the patio sort of meal...and one that Collin was very happy to see.

(Excuse my crummy food photos...apparently I tried to do all of this with my phone camera. Genius.)

In order to come up with this one, I modified a recipe from The Pioneer Woman (who I'm sure many of you are familiar with). Instead of her bruschetta chicken, I made some slight modifications and added a pile of cheese to make it into caprese chicken. Collin is a huge fan of caprese salad, so I knew that would probably make this recipe a hit.

What You'll Need :

4 chicken breasts, sliced in half
1 tbsp. olive oil
5 cloves garlic, minced
2 pt. red grape tomatoes, halved lengthwise
1 tbsp. balsamic vinegar
16 basil leaves, chiffonade
Salt & pepper, to taste
8 oz. mozzarella

Heat your oil over medium high in a large skillet. Add garlic and fry lightly for one minute. It should be golden brown. Watch the heat of your pan closely, as you really don't want to burn this stuff. It gets ugly if you do.

Pour your browned garlic into a mixing bowl and allow it to cool slightly.

Once cooled, add the tomatoes, vinegar, basil, salt & pepper. I had to actually look up chiffonade. Didn't have the slightest clue. Ya...apparently it just means to cut it into strips. So there you go. Cut your basil into strips and chuck it into the bowl. Toss your mixture around enough to fully coat the tomatoes, then cover and refrigerate for 1-2 hours. This way the tomatoes will marinate and suck up all that yummy balsamic taste. Tada! Bruschetta.

When your tomatoes are ready, season your chicken breasts with salt & pepper. I sliced my chicken into cutlets to allow for quicker cooking and a more manageable size as apparently these chickens were serious body builders.

Grill the seasoned chicken on medium heat 3-4 minutes on each side, turning once. Top with 1 oz. slice of mozzarella while hot. Spoon your lovely bruschetta and balsamic on top. Doesn't get much easier than that!


Monday, June 17, 2013

Oh 2013, You Are a Fiesty One

So...did you wonder where I'd gone? Figure me for dead? Think I'd gotten lost in the candy cane forest or drowned in the sea of swirly, twirly gumdrops? Nope. Still here. Just being eaten alive by this beast that is 2013.

I miss crafting. Seriously. It's killing me. But I've been so exhausted by the time I get home and get the stuff done around here that has to be done (my family apparently thinks eating should be a daily thing and that clean underwear should not just be a luxury) that next to nothing has been happening on this end for WAY. TO. LONG. It's sad, really.

I'm was sitting here thinking that it would be seriously nice for the rest of the year just to be easygoing after the last six months, but then I realized that hey...my brother is getting married in two months and...oh, I'm getting married in three. Crap. So much for slowing down.

Thus far this year, we've logged the following events:

1. The loss of our Lab/Chow mix, Harley after several weeks of unknown illness and several vet visits.
2. ACL surgery for our Anatolian Shepherd, Piper.
3. A legal battle with my business landlord which resulted in me settling to terminate my lease.
4. Tracking down a new location for the office.
5. Having the initial chosen location for the office fall through after countless hours of work on negotiations and needing to go with my second choice two weeks before I needed to be out of the other location.
6. Moving the practice...to another city.
7. New puppy (who chews everything).
8. Graduating 5th grader, who failed to mention the date of his graduation...until the morning OF the event.
9. Flood in the basement resulting in the need for completely new flooring.
10. Vet visit for Piper culminating in the diagnosis of the need for ACL surgery on her other hind leg (to be scheduled in about 2 weeks).
11. Dead air conditioner in the upstairs.

Oh...and everything from #3 down has occurred since April. I've spent every weekend since the first week of May at the new office getting things done or off running errands for the office.

And that wedding in September? The one I'm actually, you know, in? I haven't done one spot of preparation for it. That's right...none. It won't really be that elaborate of an affair, but you know...a location and say a dress might be a good idea. And we should probably invite people somehow. I should probably get on that. Yay for fun.

So...ha ha, 2013. You're hilarious. Thanks for sharing so much fun with me. Perhaps the Friday the 13th wedding date we have planned will be more interesting than we think...

I think I do have things at the office a little better managed though, so that should calm down. We also have Carole coming into town this week and she's decided to help us whip this house back into shape now that she's nearly finished the FIFTY home improvement projects that she planned for herself this summer (the woman is on fire). Who knows, maybe a blog post or two will come out of the list of fun we create...we'll see what happens.

Either way, I HAVE to start doing something with myself. I did a scrapbook day a couple of weeks back and it was lovely. I actually accomplished some Project Life and it was great. I will be setting aside some time here and there to do some crafting...and blogging. Period. Executive decision.

Stay tuned.


Monday, April 29, 2013

Back to Crafting!

It's been a rough month. Like, really rough. This has pretty much been me since March...

Source
I've spent the last month fighting to get out of the lease for my office, finding a new office and taking my dog to the vet. Yep...that's right...more doggy drama for 2013.

We noticed a lump on Piper's leg in March. We watched it for a couple of weeks and then decided to take her in once it didn't seem to be getting any better. The vet took a look and decided to try to aspirate it...no go. So he did a needle biopsy. We got the preliminary results of a sarcoma a few days later. So...we scheduled for an excisional biopsy.

The day before that visit, I let her out in the yard, heard her bark once, and then she came back limping. Best I can figure, she either fell in one of Sadie's holes or slipped off of the rocks in the walking path and hurt herself. When the vet went into do the removal of her lump the next day, he diagnosed her with a torn ACL. Oy. She was back for surgery the following week.

Two weeks, two stapled incisions and nearly two thousand dollars later, Piper is now an indoor dog and a cancer survivor. The lump was indeed a sarcoma, though an early stage with low chance of metastasis. We have to watch her for recurrences.

Crashing out on the bed after ACL surgery. Don't mind the blanket pile in the background. I've been lazy with housework.
The staples came out last week, but she made a quick trip back to the vet today after we noticed a new lump in the area. The vet confirmed that it's just the nylon knot from the suture used to tie her new ACL, so we're breathing easier and we've also been informed that she's healing very well. A good thing to hear. I don't think I could bear losing another dog this year. Piper's my baby.

As for work...I finally got to the point where I was sick of paying through the nose for my lease. So...I hired up my lawyer. I wound up settling with him for a sizable amount of money and we're moving out this week. In the meantime, I've been searching for a new location. I had my time wasted by a colleague with an open space who very nearly had a deal signed with me before he managed to double the price he wanted and then also sprung on me that he wanted me to pay for all of the tenant improvements on his completely unbuilt space. Umm....no.

That sucked up almost three weeks that could have been used concentrating on lining up things for the space that I am currently signing on. VERY frustrating.

In the end, I found a great location for a good price and I'll be pretty happy. The office is a bit further from my house and requires me to wake up earlier, but it will be a great deal in the end. I also managed to get myself an additional job offer in the mix.  More about that on another day...once it's all finalized.

So...ya. Needless to say, I've been burnt out and not really feeling it so much in the crafting department. I'm finally starting to pull it back together though. This weekend I made this...

An apron for 2 year old Marley...it matches the one I made for her Mama.
...and did some lazy scrapbooking. Hey...it's a start.

And now I really am getting going on stuff for the Etsy shop. I'm super excited. Things will begin being posted to the shop this weekend. Yay!!! Progress!

It will be a slow start, but once things start to settle again I WILL be posting more regularly. I'm glad to be getting back to things...it makes life feel a little bit more normal. Thanks for waiting it out with me. Craft on!!

Saturday, March 30, 2013

A Little 'Splainin to Do

I figured I should write a quick note to let those of you who read my blog know that I'm still around. I know I've been MIA for a couple of weeks, but I promise I'll come back.

This week was Spring Break and I had planned to use my whole week off of work building up a supply of product for my new Etsy shop as well as doing some tutorial posts. Well...as usual, life got in the way. I am dealing with some rather stressful and time-consuming issues at the office, so I haven't really had the free time or the energy that I had planned.

The good news is...I'm finally official! I received all of the paperwork needed for my DBA and so the Etsy shop can now really open. Once I get a few things made, we'll be ready to roll. I'm really looking forward to that.

It's looking like I'll most likely be fairly tied up for the next two weeks. I'm going to try to get up at least one post next week just so this blog doesn't look so darned dead. I have things to write! I have projects to share! One of these days life will return to (semi)normal and I'll be able to be back at it again.

So...hang in there for me. I hope to be back soon.

Saturday, March 9, 2013

Homemade Vanilla Extract

So I am mildly in love with my sense of smell. How's that for an interesting line to lead off a blog post? Seriously though, I may have an addiction. I love having Scentsy warmers running all over my house, I love smelling the air after a rain storm, and mostly...I love the smell of my house after baking. It just makes everything feel so warm and cozy.

Most of the time, I find that this is due to my gratuitous use of vanilla. Mmm...vanilla. I typically buy the imitation stuff at around 99 cents a bottle, but it just seems a little weak. The "real" stuff is crazy expensive and I can never justify shelling out a fistful of cash for an itty bitty bottle. So you can imagine my delirious happiness when I discovered that I can make my very own vanilla for just a little more than I pay for the imitation stuff.

Yup, you betcha. Baking awesomeness.


As with the homemade vanilla sugar body scrub, the homemade vanilla extract is relatively inexpensive and easy to make. Thank goodness. I love uncomplicated projects.

Here's what you'll need:

- Glass bottles (I picked these cutesies up at Cost Plus - they're actually oil and vinegar dispensers)
- Vanilla beans
- Vodka
- Scissors (preferably kitchen shears)
- 30 days (Don't worry...this isn't like Amish Friendship Bread. It doesn't need any attention.)


The glass bottles and the scissors were easy. I got the bottles when I grabbed the jars for the scrub. I already owned a pair of kitchen shears.

The vanilla beans were a little tricky. I know next to nothing about vanilla beans. Madagascar, Tahitian, Mexican, Bourbon, Tonga...are you kidding me with this? To help myself out, I found an awesome online site for buying these beauties. Beanilla.com Yup. Super helpful. They have descriptions for each type of bean to help you pick your poison. I wound up choosing Tahitian beans (Grade B) and bought a 25 bean package for $17.50.

As for the vodka, you can select more or less any kind that isn't going to overwhelm the flavor. I'd stay away from the uber budget brands, but I got my bottle of Svedka for relatively cheap. I think it was right around $10.

Take each bean and cut it widthwise to open the pod, then cut each pod in half lengthwise so that you have 4 little pieces.


Use about 1 piece per ounce in your jar. My little oil dispensers were a little over 9 oz. each and I didn't fill them all the way up. I wound up using 8 pieces per jar (i.e. 2 beans each).


Once the beans are in the jar, fill up to the desired level with the vodka and seal the top.

Allow the mixture to sit for about 30 days before use. This will allow the vodka to leach out enough of the vanilla from the beans and give you the full bodied vanilla flavor.


And that's it. Voila! I used up about 8 oz. of vodka and 2 beans for each jar. The jars themselves cost me about $1.50 each (though if you're making it for yourself, these could obviously be reused). Based on what each item cost me, this works out to about $6 per bottle. Reusing the bottle results in an actual vanilla price of $4.50 per 8 oz. bottle.

I purchased my last vanilla extract (imitation of course) from the store for $0.99 for a 4 oz. bottle. The 1 oz. pure vanilla extract bottle was on "sale" at that time for $6. Six dollars?!?!? Are you kidding me? That would make my awesome little 8 oz. bottles worth over $50 each!! Holy crap. Obviously you'll pay a little more to make real thing, but you're still not paying the ridiculous store price. And you get the good stuff.

It's worth it. Trust me.

*** Bonus information for you (thank Erin). Costco sells their pure vanilla extract for $7 for a 16 oz. bottle. Some reviews state that it contains sugar and is thus not pure vanilla extract, but it also gets high marks for flavor and quality by multiple users. So...if you don't want to wait the 30 days, you're set.

Wednesday, March 6, 2013

Homemade Vanilla Sugar Body Scrub


Okay...are you ready for about the easiest homemade project ever? Because I have it for you. And guess what? It's wonderful. Seriously. If you're like me and the girls I work with and you're addicted to Bath & Body Works, this is totally for you. It's yummy. Okay...well...not to eat. I mean, I'm sure you could eat it, but I don't know how good it would taste. And no, I will not test it for you. What I meant is that it makes your skin feel nice and smooth while also smelling like a nice batch of freshly baked cookies. Who doesn't want that?

Aren't you so glad I'm back to projects and you can suffer through my endless rambling?

So...anyway...the easy project. Ya. You're going to need a small handful of ingredients :


- Glass jars (I used 8 oz. cutsey jars that I got from Cost Plus World Market. I love their stuff. It's awesome.)

- White granulated sugar

- Brown sugar (I used golden brown, but you can use dark or light as well.)

- Olive oil (I used a canola/olive oil blend. It worked just fine.)

- Vanilla extract (Natural or imitation. Natural does have a stronger, lingering scent, but the imitation does well, too.)

And here's how you make it :

1. Mix equal parts of your sugars in each jar. I used 2 cups of each for the 8 oz. jars.


2. Add enough of the oil to cover the sugar completely and leave a small amount on the surface (~1/2-1").

3. Allow the oil to settle slightly for 3-5 minutes.

4. Stir the mixture and check the consistency to make sure you have enough oil. It should be granular with a little bit of slickness to it. You don't want a liquid. Think wet sand at the beach.

5. Add 1 tbsp. of vanilla. (You'll need to adjust this amount based on the size of your jar.) Mix the vanilla into the sugar mix until evenly distributed.


*** You can use other extracts in place of vanilla (i.e. almond, peppermint, etc.) or for a little more cash, you can use essential oils.

I then made up little labels to attach to each jar, including directions on how to use it.


Tada! Super easy, pamper me craft. Something simple that gives you a little mini spa day at home.

Tuesday, March 5, 2013

Back in the Saddle Again.

Well...I am wading through the literally thousands of photos I took between November and now. I have a lot of projects to share, but it's taking me some serious photo editing and reorganization. It's amazing how crazy things can get when you use four different cameras. Oops.

So...as a reminder...here are some of the projects I'll be working on showing you this year (in no particular order):

1. Kiddie Kitchenette
2. Sock Monkeys
3. 52 Things I Love About You
4. Patchwork Name Quilts
5. Alphabet Soup Quilt
6. Homemade Vanilla Extract
7. Homemade Sugar Scrub
8. Jean Aprons
9. Monogrammed Plates & Mugs
10. T-Shirt Quilt
11. "Sparkle" Quilt
12. Gameday Dresses
13. Little Girl Tutus
14. Pony Hoodies
15. Pajama Pants
16. Rice Warmers
17. Rag Rug
18. Beer Bottle Glasses

I'm also working on lining up some items for the Etsy shop. I hit a small snag last month so things have been delayed, but once I get one last piece in place I'll be ready to run with it. Thanks to Pinterest and some cute ideas I've gotten from store items and magazines, I have a large list of things I'm going to be making for that. I will be using the new items for tutorials on the blog as well. It will be nice to get back in the swing of crafting again.

So...starting tomorrow, expect to see more of me. I have photos for two tutorials ready to go and I'll be working on more this evening. That's right. I'm back. Let's do this thing.


Other Posts You Might LIke

Related Posts Plugin for WordPress, Blogger...
01 09 10 11 12
Blogging tips