Last night, Collin, Carole and I made a late night trip to the local grocery store found to have the lowest price per pound for their pumpkins. We loaded up three full carts and got the needed twenty-five pumpkins. We now have a mini pumpkin patch unloaded in our garage.
Today, I picked up the remainder of the needed supplies, including paint, wooden dowels and the Vaseline to keep the cut edges of my pumpkins from drying out and rotting after carving. I'm psyched. Pumpkin gutting day is set to begin a week from tomorrow. In the meantime, I will be assembling all of the necessary parts and assigning specific pumpkins to each monster.
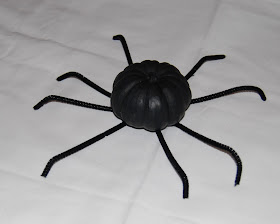
I've decided to start with the painted mini pumpkins. I selected five of them last night and got them all painted black. Three of them have been singled out to be spiders and two of them will be painted bats. (There are also carved bats planned.)
The spiders have to be the easiest of the pumpkins. Once they're painted, they assemble just like the simple stone spiders I made earlier this month.
The only real difference...use four full length pipe cleaners instead of four half-sized ones.
Arrange the pipe cleaners into a star of sorts. Bend each end of each pipe cleaner under the junction while holding on to the remainder of the "legs". Once all ends have been folded, your leg structure should hold itself together.
After that...simply glue your leg assembly onto the bottom of your painted pumpkin and allow it to dry.
Arrange the legs any which way you'd like.
And that's it. If only all of the pumpkin projects were going to be this easy to make.
 |
| A bonus picture of the pumpkin spiders under the actual porch light glow. |
This post is part of a series. For other posts on Creative Crafting, click here.


No comments:
Post a Comment